How Many Firefighters Died in 9/11 Attack?

The September 11, 2001 attacks were one of the darkest days in American history.

Among the thousands of lives lost, 343 firefighters from the New York City Fire Department (FDNY) died during the attacks, along with one firefighter from the New York City Fire Patrol, bringing the total number of firefighters who died on that day to 344.

In the years since, many additional firefighters and first responders have died from illnesses directly linked to exposure at the World Trade Center site, highlighting the long-term sacrifices made by these heroes.

What Happened on September 11, 2001?

911 Twin Towers Burning

On the morning of September 11, 2001, a series of coordinated terrorist attacks were carried out in the United States.

Hijackers flew four commercial airplanes, two of which crashed into the Twin Towers of the World Trade Center in New York City.

The South Tower collapsed less than an hour after being hit, followed by the North Tower.

This was followed by the total collapse of World Trade Center Building 7 later that day at 5:20pm, with the building falling onto its own footprint.

A third plane struck the Pentagon, while the fourth, United Flight 93, crashed in Pennsylvania after passengers attempted to retake control of the aircraft.

The attacks resulted in widespread devastation and prompted an immediate, massive emergency response.

How Many People Died on 9/11?

Approximately 2,996 people lost their lives as a result of the 9/11 attacks, not including the 19 terrorists involved.

This total includes civilians, law enforcement officers, and firefighters.

In New York City alone, the World Trade Center attacks caused 2,753 deaths, making it the single deadliest terrorist incident in U.S. history.

What Fire Departments Responded to 9/11?

911 First Responders
Image credit: CNN

The FDNY was the primary responder to the World Trade Center attacks.

Firefighters from all five boroughs of New York City, as well as mutual aid companies from nearby areas, rushed to the scene.

Other notable departments and organizations included the New York City Police Department (NYPD), Port Authority Police, and private firefighting units, all of which played crucial roles in evacuation, rescue, and firefighting efforts.

The response was immediate and heroic, with personnel entering collapsing structures to save civilians and fellow first responders.

How Many Firefighters Died on 9/11?

Firefighters Who Died on 911
Image credit: Fire Engineering

During the attacks themselves, 343 FDNY firefighters were killed while performing rescue operations and attempting to evacuate the Twin Towers.

These men and women included firefighters of all ranks, from probationary firefighters to chiefs, reflecting the broad participation of the FDNY workforce that day.

Additionally, Keith Roma, a firefighter with the New York City Fire Patrol, also died responding to the scene, which brings some records to cite 344 total firefighter deaths.

Many of these individuals were trapped in the towers when the structures collapsed, illustrating the extreme danger and heroism of the operation.

How Many First Responders Died on 9/11?

Firefighter at Ground Zero

Beyond firefighters, other first responders also lost their lives, including 23 police officers and 37 Port Authority officers.

Collectively, the number of first responders who perished that day amounted to approximately 403 individuals, highlighting the extreme risk faced by those on the front lines of the attacks.

How Many Firefighters Have Died from 9/11 Related Illnesses Since the Attack?

Tragically, the toll of 9/11 extends far beyond that single day.

Exposure to toxic dust, smoke, and debris at Ground Zero has resulted in chronic illnesses and cancers among first responders.

As of 2024, over 200 additional FDNY firefighters have died from 9/11-related illnesses, including respiratory diseases, gastrointestinal cancers, and other health complications directly linked to their work at the site.

This ongoing loss underscores the long-term dangers faced by first responders and the need for continued healthcare support and monitoring for those who served during the recovery and cleanup efforts.

Why We Should “Never Forget”

911 Memorial
Image credit: Wikipedia

The heroism displayed by firefighters and other first responders on 9/11 serves as a lasting testament to courage and selflessness.

Remembering their sacrifices not only honors the fallen but also emphasizes the importance of preparedness, training, and community support for emergency responders.

Memorials, educational programs, and annual ceremonies ensure that their bravery and the lessons of 9/11 continue to be recognized worldwide.

Key Takeaways

  • 343 FDNY firefighters died on 9/11, with an additional firefighter from the Fire Patrol, totaling 344 firefighter deaths on the day.
  • Thousands more first responders have died in subsequent years due to 9/11-related illnesses.
  • The FDNY, NYPD, Port Authority Police, and other agencies worked heroically to save lives amid unprecedented chaos.
  • Ground Zero exposure has long-term health consequences, emphasizing the sacrifices of first responders.
  • Remembering these heroes helps educate and inspire future generations while highlighting the risks and responsibilities of emergency personnel.

The 9/11 attacks resulted in an immense and lasting loss for firefighters and first responders. 

343 FDNY firefighters perished during the attacks, and hundreds more have died since due to illnesses caused by exposure at the World Trade Center site.

Their bravery, sacrifice, and continued impact are a powerful reminder to honor and support those who serve in the fire and rescue professions.

9 Common Electrical Fire Causes

Electrical fires are typically started by faulty wiring, overloaded circuits, malfunctioning appliances, or improper use of extension cords and space heaters.

These problems create heat, sparks, or arcing that can ignite nearby combustible materials and lead to a fast-spreading fire.

Our article explains what an electrical fire is, the nine most common electrical fire causes, how to recognize the early warning signs, and clear, practical steps you can take to prevent electrical fires in homes and workplaces.

What is an Electrical Fire?

An electrical fire begins when an electrical fault, such as overheating, arcing, or a short circuit, creates enough heat to ignite nearby materials like insulation, paper, fabrics, or wood.

Electrical fires can be particularly hazardous because they may start inside walls or behind appliances where smoke and heat go unnoticed until the fire has grown.

Electrical systems are a common ignition source and are linked to tens of thousands of fires each year.

What Causes an Electrical Fire?

Below are the nine most common electrical fire causes, explained in plain language so you can recognize risks and address them.

1. Faulty Outlets

Faulty Outlets

Outlets that are loose, cracked, or discolored can produce poor connections and arcing i.e. tiny sparks that generate intense heat.

A plug that feels loose in the socket or an outlet that looks charred are strong warning signs.

If you notice any of those signs, stop using the outlet and get a qualified electrician to inspect it.

2. Overloaded Circuits

Overloaded Circuits

When too many appliances draw power on the same circuit, wires and devices can overheat.

This is especially common in older homes that were not wired to code to handle today’s devices (air conditioners, large TVs, chargers, etc.).

Repeated tripping of a breaker or frequent blown fuses are signs a circuit is overloaded and needs attention.

3. Faulty Appliances

Faulty Appliances

Appliances with frayed cords, damaged plugs, or internal faults may overheat or short-circuit.

The risk increases when an appliance is used beyond its intended purpose or left running unattended for long periods.

When an appliance shows signs of smoke, sparks, or a burning smell, unplug it and have it inspected or replaced.

4. Faulty Wiring

Faulty Wiring

Old, degraded, or improperly installed wiring is a principal cause of electrical fires.

Insulation that is worn or chewed by rodents, loose connections at junctions, and wiring that cannot carry modern electrical loads can all lead to overheating and arcing.

If your home is several decades old and has never had an electrical inspection, consider having a licensed electrician evaluate the system.

5. Overloaded Light Fixtures

Overloaded Light Fixtures

Using bulbs with higher wattage than a fixture supports or placing flammable materials too close to lamps can cause fixtures and shades to overheat and ignite.

Always use the maximum wattage specified on the fixture and prefer LED bulbs, which operate at a cooler temperature and reduce heat risk.

6. Extension Cords

Extension Cords

Extension cords are meant to be temporary.

Running large appliances on extension cords, routing cords under carpets, or using damaged cords increases the risk of overheating and electrical fires.

If you rely on extension cords regularly, the safer long-term solution is to install additional wall outlets.

7. Portable Space Heaters

Portable Space Heaters

Space heaters are a leading source of electrical fires when placed too close to curtains, bedding, furniture, or papers.

Heaters with exposed coils are particularly risky.

Keep a three-foot clearance around any space heater, use models with tip-over and overheat protection, and always switch them off when leaving the room or going to sleep.

8. Ungrounded Plugs

Ungrounded Plugs

Three-prong plugs include a grounding prong that directs fault current safely to ground.

Removing the prong to fit a two-slot outlet eliminates that protection and increases fire and shock risk.

Never alter plugs, and instead have properly grounded receptacles installed by a licensed electrician.

9. Flammable Materials Near Fixtures

Flammable Materials Near Fixtures

Even a small electrical fault can ignite nearby flammable items like paper, curtains, clothing, or cardboard.

Lamps, chargers, and appliances should be positioned so combustible materials cannot drift or be placed close to heat sources.

Regular housekeeping to remove clutter reduces combustible materials and gives electrical faults less to burn.

Signs of an Electrical Fire

Early fire detection can prevent a small electrical problem from becoming a major blaze. Watch for these telltale signs:

  • A strong burning or plastic-like odor, especially near walls, outlets, or appliances.
  • Sparks, flickering lights, or outlets that feel warm to the touch.
  • Breakers that trip frequently or fuses that blow repeatedly.
  • Discolored, scorched, or sizzling outlets or switch covers. 

If you notice any of these signs, cut power to the affected area and call a licensed electrician.

If a fire is already present or smoke is spreading, evacuate immediately and call emergency services.

How to Prevent Electrical Fires

Electrical Inspection

Prevention centers around inspection, sensible use of appliances, and following electrical safety best practices.

Below are practical measures you can take:

Regular Wiring Inspection

Have a licensed electrician inspect your home’s wiring every few years, and more often for older properties.

Inspections identify worn insulation, overloaded circuits, and unsafe modifications before they become hazards.

Upgrade Your Electrical Panel

If your panel is outdated or cannot cope with modern loads, upgrade it to a newer model.

Modern panels, combined with devices like Arc Fault Circuit Interrupters (AFCIs), reduce fire risk by detecting dangerous arcing and shutting off power before ignition.

Avoid DIY Electrical Work

Electrical work should be done by licensed professionals.

Improper wiring, incorrect connections, and noncompliant installations are common causes of later fires.

Even seemingly simple tasks, like replacing an outlet, can be risky without the right knowledge and tools.

Avoid Overloading Electrical Outlets

Distribute high-draw appliances across different circuits and do not use power strips for large appliances.

If you are frequently tripping breakers, have an electrician evaluate and balance your loads or install additional circuits.

Use the Correct Lightbulbs

Match bulb wattage to the fixture rating and choose LED bulbs for lower heat output.

Inspect lampshades and fixtures for discoloration or damage and replace components as needed.

Use Space Heaters Safely

Choose heaters with built-in safety features and never place them on soft surfaces.

Keep them away from flammables and never leave them unattended.

Install Smoke Detectors

Working smoke alarms give the earliest warning.

Install alarms on every level and in or near sleeping areas, and test them monthly.

Interconnected alarms are best because all units sound if any one detects smoke. 

Get Fire Extinguishers and Blankets

For very small electrical fires, an ABC-rated or multi-purpose extinguisher may be effective, but only if you are trained and it is safe to do so.

Never use water on electrical fires; water conducts electricity and can cause shock and spread the hazard.

For small cooking or clothing fires, a fire blanket or baking soda can help smother flames.

Devise a Fire Emergency Plan

Have an evacuation plan, clear exits, and a meeting point outside the home.

Teach all household members how to shut off main power and call emergency services.

Practice escape routes regularly.

Key Takeaways

Electrical fires are caused by predictable and preventable issues: faulty wiring, overloaded circuits, damaged appliances, misuse of extension cords, and unsafe heating or lighting practices.

Recognize the warning signs like burning smells, warm outlets, flickering lights, and act promptly by cutting power and contacting a professional.

Regular inspections, sensible appliance use, modern safety devices such as AFCIs, and working smoke alarms dramatically reduce risk.

Staying informed and taking straightforward safety steps is the single most effective way to protect people and property from electrical fires.

Dangers of Overloading Electrical Sockets

Plugging too many devices into one plug socket might seem harmless, yet it poses a serious hazard in homes. 

Many of us have been tempted to cram an extra gadget into a multi-plug adaptor, but that ‘just one more’ could be one too many if it leads to an overloading electrical sockets. 

Overloaded sockets are a leading cause of home electrical fires

That means thousands of families suffer preventable fires due to something as simple as an overburdened outlet. 

This article explains what socket overloading means, why it’s dangerous, real examples of the risks, and practical tips to stay safe. 

Being aware of the dangers of overloading electrical sockets can help you protect your home and loved ones from a very real hazard.

What is Overloading Electrical Sockets?

what is overloading electrical sockets

Overloading electrical sockets means drawing more current through a socket than it is designed to handle. 

A standard wall socket in the UK is rated for about 13 amps of current at most. 

If you plug in appliances whose combined demand exceeds that limit, the socket and wiring can overheat. 

People often accidentally overload sockets by using multi-way adaptors or extension leads to connect multiple appliances to one socket. 

For example, running several high-wattage appliances, such as a heater, kettle, and hair dryer, from a single socket at the same time can quickly push the load beyond safe levels. 

It’s important to realise that even if an extension strip has four or six outlet holes, they all feed from one wall socket.

This means the overall limit is still 13 A in total. 

Having more sockets available on a strip does not increase the amount of power the wall supply can safely provide. 

The excess current drawn through by overloading electrical sockets produces heat in the wires, plug, and socket itself. 

Over time this heat can melt insulation, damage the outlet, or even start a fire.

Dangers of Overloading Electrical Sockets

overloading electrical sockets dangers

Overloading electrical sockets can have many serious dangers.

These can include:

Fires

The primary danger of an overloaded socket is the risk of fire. 

When a socket is overburdened, the electrical cables and components can get extremely hot. 

This overheating can melt plastic plugs, scorch socket covers, and ignite nearby materials. 

Worryingly, electrical fires often start hidden behind walls or around sockets, so you might not notice the problem until a fire has already taken hold. 

Once an electrical fire starts, it can spread quickly and release toxic smoke, endangering anyone inside.

Damaged Wiring

Even if a fire doesn’t break out immediately, excess heat will still damage your wiring and devices. 

The internal wiring of the socket or extension lead can become charred or lose its insulation due to the heat, making it unsafe for future use. 

Electric Shocks

Overloading electrical sockets may have melted components that expose live electrical parts.

This can create a risk of electric shock the next time someone touches or uses them. 

Sensitive electronics plugged into an overloaded socket can also be harmed.

The stress on the circuit might cause voltage fluctuations that shorten the life of appliances or even destroy them. 

Blown Fuses and Tripped Circuit Breakers

Additionally, repeatedly overloading electrical sockets may cause fuses to blow or circuit breakers to trip frequently. 

While these safety devices are meant to protect you, continually tripping the power can weaken a circuit breaker over time, potentially reducing its effectiveness. 

If a breaker or fuse ever fails to trip when it should, an overload can go unchecked and lead to wiring overheating to dangerous levels. 

Cost of Repairs

Beyond the immediate safety hazards, the aftermath of an electrical overload can be devastating financially, from repairing burnt wiring to replacing lost belongings if a fire destroys part of your home. 

How to Avoid Overloading Electrical Sockets

how to avoid overloading electrical sockets

Preventing overloading electrical sockets is straightforward with some simple precautions. 

Here are a few practical tips to avoid overloading your electrical sockets:

One Plug Per Socket When Possible

Stick to one appliance per wall socket, especially for high-power devices. 

High-wattage appliances like microwaves, washing machines, or space heaters should each have their own dedicated socket.

Don’t Daisy-chain Extensions

Never plug one extension lead into another, known as ‘daisy chaining’. 

Using a single multi-way extension strip is acceptable within its capacity, but linking extensions together greatly increases the risk of overload and fire.

Use the Right Type of Adaptor

If you need to plug in multiple low-power items, use a good-quality bar extension strip with a built-in fuse or surge protector. 

Avoid cube-shaped block adaptors that lack fuses as these can overheat more easily.

Know Your Limits

Check the rating of extension leads and adaptors and add up the amperage of all devices you’re connecting. 

Do not exceed the maximum current indicated. 

If in doubt, you can use a socket overload calculator to double-check that your planned combination of devices stays within safe limits. 

Remember that 13 amps is roughly equal to 3,000 watts at UK mains voltage, which is easily reached by just a couple of high-power appliances.

Unplug Devices When Not in Use

Disconnect appliances or chargers that you’re not actively using. 

This reduces unnecessary load on the socket and minimises the risk of overheating. 

It’s especially important to switch off and unplug items like portable heaters or phone chargers overnight or when you leave the house.

Uncoil Extension Reels Fully

If you use a coiled extension cable, always unwind it completely before use. 

A coiled power cable can act like a heating element and overheat if left bundled, even if you’re drawing what would normally be a safe amount of current.

Install More Outlets if Needed

If you find you’re constantly juggling plugs or relying on extension leads daily, consider having a qualified electrician install additional wall sockets in high-use areas. 

This permanent fix can eliminate the temptation to overload a single outlet.

Be Alert to Warning Signs

Training yourself to understand overloading warning signs is a must.

Stop using a socket immediately if you notice signs of overload such as plugs that feel hot, a smell of burning plastic, scorch marks around the socket, buzzing or crackling sounds, or fuses repeatedly blowing. 

These indicate a potentially dangerous issue that should be checked by an electrician right away.

Key Takeaways

Overloading electrical sockets is an easily avoided hazard once you understand the risks. 

It simply requires mindfulness about how many appliances are drawing power from a single socket. 

As we’ve seen, the consequences of ignoring socket limits range from melted plugs and power outages to catastrophic fires. 

The good news is that by spreading out your electrical devices, using proper extension leads wisely, and not pushing a socket beyond its capacity, you can keep your home safe. 

Regularly checking that sockets are cool to the touch and not surrounded by a tangle of adaptors is a simple habit that can prevent disasters. 

Remember that certain times of year or situations can put extra strain on your sockets. 

By respecting the limits of your plug sockets and following basic precautions, you ensure that the convenience of modern gadgets doesn’t come at the cost of your family’s safety. 

Take the time to educate everyone in your household about not overloading electrical sockets, so that safe practices are followed consistently. 

The minor inconvenience of using fewer gadgets at once or buying an extra extension lead is nothing compared to the major disruption of dealing with a house fire.

If you have any doubts or persistent electrical issues, it’s wise to consult a qualified electrician. 

It’s always better to be safe than sorry when it comes to electricity.

Changing a Battery in a Smoke Alarm

Smoke alarms are essential life-saving devices that warn us of fire, but they can only do their job if they have power. 

You are around 8 times more likely to die in a fire if you do not have a working smoke alarm. 

Many fatal home fires occur in houses that had smoke alarms installed but the alarms failed to go off, often due to missing or dead batteries. 

But how does changing a battery in a smoke alarm work?

Whether your smoke alarm is a standalone battery-powered unit or a mains-wired alarm with a backup battery, checking and changing the battery regularly is critical. 

This ensures the alarm will function when it’s needed most..

How to Change a Battery in a Smoke Alarm?

how to change a battery in a smoke alarm

Changing the battery in a smoke alarm is a straightforward task, but it’s important to do it correctly for the alarm to work. 

If you have a battery-powered smoke detector, the process involves opening the device, swapping the old battery for a new one. 

Here is a simple step-by-step guide for typical battery replacement:

Open the Alarm Cover

Most alarms either have a cover that twists or lifts off. 

Gently remove or twist the cover or the body of the alarm to expose the battery compartment. 

Remove the Old Battery

Unclip or slide out the old battery from its holder. 

It may be connected by a snap-on connector or simply held in a slot. 

Take note of how it was oriented.

Insert the New Battery

Put the new battery in the same way the old one was. 

Match the + and – terminals correctly so the markings on the battery align with those on the alarm’s battery contacts. 

Push the new battery firmly into place or reconnect the snap-on connector if there is one. 

Use the type of battery recommended by the alarm manufacturer.

Close the Alarm

Fit the cover or alarm unit back into place and make sure it clicks or twists closed securely. 

Finally, press and hold the test button on the smoke alarm until the alarm sounds a loud beep. 

This confirms that the new battery is working and the alarm is functioning.

What Types of Batteries are in Smoke Alarms?

what types of batteries in smoke alarm

Smoke alarms can use a few different types of batteries, and it’s important to use the right kind. 

9-Volt / AA

Most standard smoke alarms use either a 9-volt battery or AA batteries as their power source. 

Traditionally, many alarms took a single rectangular 9V battery (often called a PP3 battery). 

In newer models, it’s common to find replaceable AA batteries (usually 2 or 3 AA cells) instead of a 9V. 

These AA batteries together provide the required power and often have a higher combined capacity, meaning they can keep the alarm running longer.

Always check your alarm’s manual or look at the existing battery to know what type to use as a replacement. 

Long Life Lithium

There are also long-life lithium batteries available for smoke alarms. 

Some modern alarms come with 10-year sealed lithium batteries built in. 

These batteries are not removable; instead, the entire alarm is designed to operate for ten years on that sealed battery, after which you replace the whole alarm unit. 

Ten-year sealed battery alarms are popular because you don’t have to change the battery every year.

They give continuous power for the life of the alarm, and then you dispose of the unit once the battery is exhausted.

Mains

For mains-powered smoke alarms, the primary power comes from your house’s electrical supply, but they almost always have a backup battery. 

This backup is usually a 9V battery or sometimes a couple of AA batteries, depending on the model. 

The backup battery is there to ensure the alarm will still work if there’s a power cut. 

Mains-powered alarms still need their batteries replaced periodically, just like battery-only alarms. 

The difference is that a mains-wired unit will draw its daily power from the mains electricity.

However, if that backup battery is dead or missing, the alarm won’t sound. 

So keep the backup battery fresh.

Coin Cell

Occasionally, some compact smoke detectors use other battery types like built-in coin cell batteries or special long-life batteries. 

For example, a few small-form smoke alarms might use a lithium coin cell or a specialised lithium pack. 

These are less common, but the key point is to always use the exact type of battery recommended by the alarm’s manufacturer. 

Using an incorrect battery type (for instance, the wrong voltage or chemistry) could either prevent the alarm from working or cause it to underperform.

What to Avoid When Changing a Battery in a Smoke Alarm?

While changing a smoke alarm battery is simple, there are some important things to avoid to ensure your alarm remains effective and safe:

Not Replacing Battery

Do NOT leave the alarm without a battery. 

One of the biggest mistakes is removing the old battery and then forgetting to insert a new one immediately. 

Even leaving a smoke alarm without a battery for a short time is risky.

You might get distracted and not return to it. 

Always have a new battery on hand before you take the old one out. 

If an alarm is beeping in the middle of the night due to low battery, resist the temptation to just take the battery out to silence it and then go back to sleep. 

Unfortunately, some people do this and then neglect to put a new battery in later, leaving them unprotected. 

Never disable or remove the battery to quiet a ‘nuisance alarm’, instead fan out the smoke or use a hush button if your alarm has one. 

An alarm with no power won’t save your life in an emergency.

Wrong Battery Type

Avoid using the wrong type or a poor-quality battery. 

Smoke alarms are designed to use a specific battery type. 

Don’t try to fit a physically incompatible battery or one with incorrect voltage. 

For instance, do not try to power a 9V-only alarm with some makeshift combination of other batteries. 

Also, it’s best to use good quality batteries from reputable brands for smoke detectors. 

Cheap or old batteries may not last as long or could leak. 

Follow any guidance in your alarm’s manual about which batteries are recommended. 

Using the exact type (alkaline vs lithium, etc.) that’s advised will ensure the alarm functions correctly. 

If your alarm uses multiple cells (like 2×AA), always replace all of them at the same time with new batteries from the same pack.

Never mix old and new batteries together in the alarm, as this can cause leakage or reduced performance.

Recharge Batteries

Do not use rechargeable batteries in smoke alarms (unless the manufacturer specifically allows it). 

Rechargeable batteries are generally not recommended for smoke alarms. 

This is because rechargeables (like NiMH 9V or NiMH AA cells) have a slightly lower voltage and they self-discharge over time. 

They can run down much faster than normal alkaline batteries, even if you don’t use the alarm often. 

For example, some rechargeable 9V batteries might lose their charge in a matter of weeks or a couple of months, which is not reliable for a device that needs to work 24/7. 

Most smoke alarm manufacturers and fire safety experts advise against using rechargeable cells, as they may not meet the required backup time and reliability standards for an alarm. 

Stick to standard alkaline or lithium batteries as recommended.

Damage

Avoid damaging the alarm or its parts during battery replacement. 

When opening the alarm and handling the battery, be careful. 

Do not force the battery in or bend the contacts excessively.. 

If you accidentally pull a wire or break the battery clip, the alarm could malfunction. 

In such cases it would be better to replace the entire alarm. 

So take your time and handle everything gently. 

If the battery has a little plastic ribbon or tab designed to help pop it out, use that to remove it rather than prying roughly with tools.

When to Change a Battery in a Smoke Alarm?

when to change a battery in a smoke alarm

Knowing when to replace your smoke alarm’s battery is just as important as knowing how. 

Batteries don’t last forever, and a smoke alarm will give you warnings when its battery is weak, but you shouldn’t rely solely on the alarm’s chirp. 

Here are the key guidelines on when to change the battery:

At Least Once Every Year

For typical smoke alarms with replaceable batteries, the standard recommendation is to replace the battery annually. 

Many fire services advise changing the battery every 12 months, even if the alarm hasn’t started chirping yet. 

This pre-emptive change ensures the alarm will not run low at an inconvenient or dangerous time. 

Choosing a date you’ll remember, like your birthday or New Year’s Day, is a good way to make it part of your yearly routine. 

If your alarm uses standard alkaline batteries, they are inexpensive, and it’s worth the small cost for peace of mind.

Low Battery Warning

Your alarm will alert you when its battery is getting weak by emitting a regular ‘beep’ or ‘chirp’ sound. 

When you hear this, replace the battery immediately. 

The alarm is telling you it doesn’t have much power left. 

Don’t ignore it. 

Once chirping starts, install a fresh battery right away. 

This should stop the beeping and restore full function. 

If the alarm continues to chirp after a battery change, it could indicate a different issue, such as a fault in the alarm or that the unit is at the end of its life.

If it Fails a Test

You should be testing your smoke alarms regularly. 

If you press the test button and it doesn’t sound, it could mean the battery is dead. 

First, check if the battery is properly fitted. 

If the alarm still doesn’t sound, try a fresh battery. 

If that doesn’t solve the issue, the alarm itself may be faulty or too old and should be replaced.

Key Takeaways

You should now have an understanding of changing a battery in a smoke alarm.

Maintaining your smoke alarm’s battery is a small chore that carries a huge reward.

it could save your life and the lives of your loved ones. 

Many fire fatalities happen in homes where smoke alarms were present but had failed, often due to flat or missing batteries. 

This is a tragic statistic because it’s preventable with simple maintenance.

The bottom line is that a few minutes of simple maintenance can provide around-the-clock protection. 

Keep your smoke alarms powered, tested, and in good shape.

This way, if a fire ever breaks out, the alarm will reliably give you that urgent warning to get out safely. 

Stay safe!

Where to Install a Carbon Monoxide Detector in Your Home

Carbon monoxide (CO) is often called the ‘silent killer’ because it is an invisible, odourless gas that can be deadly. 

CO poisoning causes dozens of accidental deaths each year and many more illnesses. 

The best protection against this danger is a carbon monoxide detector.

A carbon monoxide detector is a small alarm device that can alert you to CO gas in the air before it harms you. 

However, installing the detector in the right place is crucial. 

What is a Carbon Monoxide Detector?

what is carbon monoxide detector

A carbon monoxide detector (also known as a CO alarm) is a safety device designed to detect the presence of carbon monoxide gas.

It serves a similar role to smoke detectors, but instead of sensing smoke, it monitors for carbon monoxide. 

Because carbon monoxide is impossible for us to detect on our own, a detector is often the only way to know if this gas is building up in your home. 

Carbon monoxide detectors are typically small, battery-powered or mains-powered units that can be mounted on a wall or ceiling. 

They continuously sample the air for CO. 

If the device senses a dangerous concentration of carbon monoxide, it will emit a loud, high-pitched alarm to warn everyone in the vicinity. 

Many modern CO alarms also have test buttons and indicator lights, and some models include digital displays to show CO levels.

Basically, a carbon monoxide detector acts as an early warning system .

It will alert you as soon as CO is present at hazardous levels, giving you time to ventilate the area or evacuate. 

By installing CO detectors in your home, you can be warned of a carbon monoxide leak before it reaches life-threatening levels. 

Where to Install a Carbon Monoxide Detector in Your Home

where to install a carbon monoxide detector

Knowing where to install your carbon monoxide detectors is just as important as having them. 

To provide effective protection, detectors should be placed in locations where they can detect CO quickly and alert people throughout the home. 

The general rule is to install CO alarms near any potential source of carbon monoxide, and near areas where people sleep. 

This ensures that if a dangerous CO leak occurs, the alarm will pick it up early and wake you up if you’re sleeping.

Here are some guidelines for positioning CO detectors in your home:

In Rooms With Fuel-burning Appliances

Place a detector in each room that contains a potential CO source, such as a gas boiler, gas fire, wood-burning stove, or gas cooker. 

For example, if you have a gas boiler in the kitchen or a fireplace in the living room, install a CO alarm in those rooms. 

It should be installed at a distance of 1–3 metres from the appliance, if possible, rather than right next to it. 

This distance helps the detector sample the air in the room effectively without being immediately exposed to small transient puffs of exhaust from the appliance. 

Avoid placing it directly above a cooking appliance or fire, to prevent false alarms from normal fumes or steam.

Near Bedrooms and Living Areas

It’s crucial to have a carbon monoxide detector where it can be heard if you are sleeping. 

CO alarms should be located close to where you sleep.

This includes in each bedroom or in the hallway just outside sleeping areas. 

If carbon monoxide leaks at night, an alarm near the bedrooms will sound and wake people up. 

In living spaces like lounges or any room you spend a lot of time in, position a CO detector at roughly head height.

On Each Level of a Home

Ideally, have at least one CO detector on every floor of your house. 

For a two-storey house, that means one upstairs and one downstairs. 

In a single-storey property or apartment, make sure the one alarm you have is located centrally where its alarm can be heard throughout, and not too far from the main bedroom.

Height and Positioning

Carbon monoxide detectors can be installed on the ceiling or high up on a wall. 

Carbon monoxide has roughly the same density as air and also tends to mix with warm air rising from appliances. 

Therefore, you should place the detector at a height where it will detect the gas in the room’s air column. 

If wall-mounting, put it at least as high as any door or window in that room and about 1.5 metres from the floor. 

If ceiling-mounting, it should be at least 30 cm away from the nearest wall, since corners or edges of the ceiling can create dead air space. 

Always follow the manufacturer’s mounting instructions specific to your detector model, as some detectors are designed to be wall-mounted and others on the ceiling.

Garages

If your home has an attached garage, it is wise to install a CO alarm in the room adjacent to the garage door. 

Car exhaust is a common source of carbon monoxide, and fumes can seep into the house from the garage. 

By placing a detector near the internal door to the garage, you’ll be warned if a car left running or any petrol tools in the garage are causing CO to enter your home.

How Does a Carbon Monoxide Detector Work?

how carbon monoxide detector works

A carbon monoxide detector works continuously to sniff out any CO gas. 

Most modern CO detectors use an electrochemical sensor to detect carbon monoxide. 

This sensor reacts with CO gas and generates an electrical signal proportional to the concentration of CO present. 

In simple terms, the detector is constantly measuring the parts-per-million (ppm) level of carbon monoxide in the surrounding air.

When the CO level climbs too high, the detector’s built-in alarm is triggered. 

Carbon monoxide detectors are designed to activate before healthy adults start feeling symptoms of poisoning. 

They often operate on a concentration-time function.

Even relatively low CO concentrations will set off the alarm if they persist for several hours, while higher concentrations trigger the alarm much faster. 

This ensures you are warned in time to take action.

Power Supply

Most CO alarms on the market are battery-powered, though some plug into mains outlets or are hard-wired into a home’s electrical system. 

Regardless of power source, they all function similarly. 

Alarm

The alarm sound is distinct and piercing (often an intermittent series of loud beeps). 

It is designed to be audible enough to wake people from sleep and alert everyone in the house. 

Where Not to Install a Carbon Monoxide Detector

where not to install a carbon monoxide detector

Installing your carbon monoxide detector in the wrong place can undermine its ability to protect you. 

It may lead to false alarms or, worse, failing to alarm when it should. 

To ensure your CO alarm works effectively, you need to avoid certain bad locations and placement mistakes. 

Let’s look at where not to install a carbon monoxide detector:

Blocked or Enclosed Spaces

Never install a CO detector inside a cupboard, behind heavy furniture, or in any enclosed space. 

The sensor needs access to circulating air to detect CO. 

If it’s obstructed or hidden, it may not sense the carbon monoxide until it’s too late. 

Similarly, don’t put it in a narrow corner or at floor level behind curtains. 

Keep it out in the open where air flows freely around it.

Too Close to Appliances

While you want the detector in the same room as a fuel-burning appliance, placing it right next to or above the appliance can be problematic. 

For instance, mounting a CO alarm directly above a gas cooker or very close to a boiler could lead to nuisance alarms. 

If the detector is too close, it might alarm unnecessarily. 

These frequent false alarms can cause people to become desensitised or to disable the alarm. 

For that reason, a minimum distance (often about 1–3 metres or roughly 10 feet) is recommended between the alarm and the appliance. 

This way the detector monitors the general air in the room, not just the immediate vicinity of the appliance’s exhaust.

Near Windows, Vents, or Fans

Avoid installing a carbon monoxide detector right next to a window, exterior door, air vent, or ventilation fan. 

Draughts and fresh air from outdoors can dilute the carbon monoxide in that area, so the detector might not register the gas even if CO is present elsewhere in the room. 

CO could be building up in a different part of the room while fresh air near the detector keeps it low at that spot. 

Likewise, being next to a heating or air conditioning vent can blow air on the sensor and potentially prevent it from detecting CO. 

Always place detectors at least a few feet away from any sources of strong drafts or ventilation.

High Humidity

Do not install CO alarms in bathrooms or above cookers and kettles where they will be exposed to a lot of steam and humidity. 

Excess moisture in the air can interfere with the sensor and lead to false alarms or corrosion over time. 

A hot steamy shower could trigger a nearby CO alarm falsely, or constant humidity might damage its electronic components. 

Keep detectors out of very damp areas like bathrooms, laundry rooms, or right next to humidifiers. 

The same goes for areas with grease or smoke from cooking. 

Grease buildup can clog the sensor opening. 

It’s best to have the kitchen CO detector at least a few metres away from the hob or oven.

Extreme Temperatures

CO detectors generally should be used in living spaces. 

Placing one in an environment that is extremely cold or hot (outside the typical range of about -10°C to 40°C) can cause it to malfunction. 

If you put a detector in an unheated garage or attic that freezes in winter, its battery or sensor might not work properly. 

Instead of mounting an alarm inside a potentially extreme environment like a loft or garage, mount it in the adjacent room where it will still detect CO. 

Always check the manual as it will specify the acceptable temperature and humidity range for the unit.

Out of Earshot

An often-overlooked ‘wrong place’ is any location where you would not hear the alarm. 

Remember that the purpose of a CO detector is to wake you or alert you to danger. 

If you install one in a far corner of the basement but you sleep two floors up, that’s not going to be very useful unless the alarms are interconnected. 

Make sure at least one alarm is close enough to sleeping areas that it would wake everyone up. 

If you have a large home, consider interconnected alarms that all sound if one detects CO, so you can hear the alert everywhere. 

For a standard standalone detector, place it within hearing range of bedrooms.

Carbon Monoxide Sources in Your Home

carbon monoxide sources

We’ve talked about where to put CO detectors, but what are the common sources of carbon monoxide inside a home? 

Carbon monoxide is produced by the incomplete burning of carbon-based fuels. 

This means any appliance or equipment that burns gas, coal, wood, oil, petrol, charcoal, or other fossil fuels can potentially produce carbon monoxide.

In a household setting, several sources can create CO gas:

Gas-fired Appliances

This includes gas boilers (central heating systems), gas water heaters, gas fires in fireplaces, and gas cookers/ovens. 

When working correctly, these appliances burn gas (natural gas or LPG) cleanly to produce heat. 

However, if they are faulty, poorly ventilated, or not properly adjusted, they can produce carbon monoxide. 

For example, a boiler with a blocked flue or a cooker with a yellow, inefficient flame can release CO into your kitchen or utility room. 

It’s one reason regular servicing of gas appliances is so important.

Solid Fuel and Wood Burning Appliances

Wood stoves, coal stoves, open fireplaces, and pellet burners can all emit carbon monoxide. 

Solid fuels naturally create CO as they smoulder and burn. 

If you have a chimney or flue that’s partially blocked or a stove that isn’t drawing properly, CO can spill back into the room. 

Even dying embers in a fireplace overnight can produce CO. 

Always ensure chimneys are clear and well-maintained, and have a CO detector in any room with a fireplace or wood-burning stove.

Vehicle Exhaust

If you have an attached garage, a prime source of carbon monoxide is a car engine. 

Running a car in a garage can build up CO. 

If the garage is attached to the house, the gas can seep through doorways or any small gaps into the home. 

This is why it’s essential to have detectors near the door to an attached garage and of course. 

Never leave vehicles running inside the garage with the door closed. 

Even with the garage door open, CO can accumulate in the garage and drift indoors. 

Some people warm up cars in winter or leave engines running unwittingly and a CO alarm can pick up the danger if those fumes begin entering the home.

Key Takeaways

You should now have more of an understanding of where to install a carbon monoxide detector in your home.

Carbon monoxide detectors are a simple but vital addition to any home that has a fuel-burning appliance. 

They provide an early warning of a deadly gas that you cannot see or smell.

By following the placement guidelines outlined above, you and your family will be alerted in time to act.

Always remember to maintain your detectors: test them regularly and replace the batteries as needed. 

Additionally, maintain your fuel-burning appliances with regular servicing to prevent CO problems at the source.

In a house equipped with properly placed carbon monoxide detectors, you can rest easier knowing you have a watchdog against this silent hazard. 

The shrill beeping of a CO alarm at 3 AM might be jarring, but it could save your life. 

It’s far better than the alternative of not knowing about a carbon monoxide leak.

How to Test Smoke Alarms Properly

A smoke alarm is one of the most important safety devices in the home, yet they’re often overlooked until it’s too late.

If you have one installed, testing your smoke alarm regularly is a simple task that can save lives.

To test a smoke alarm, press and hold the test button on the front panel until you hear a loud, continuous sound.

If the alarm does not sound, replace the battery. If it’s a sealed unit, speak to a specialist to replace the alarm. 

You can also use a smoke detector test spray or safe smoke source to check the sensor, following the manufacturer’s guidance.

Our article explains exactly how to test your smoke alarm properly, how often you should test it, what to look out for, and what to do if something’s not right.

Whether you’re a homeowner, renter, or responsible for a business premises, this guide will leave you better informed and safer.

What is a smoke alarm and do I need one?

What is a Smoke Alarm

Smoke alarms are devices specifically designed to detect smoke (a primary indicator of fire), and sound an audible warning to alert people in the building.

Most smoke alarms operate using either ionization sensors, which respond to fast, spreading fires, or photoelectric sensors, which are better at detecting slow, smoldering fires. 

Some units combine both technologies for a more comprehensive coverage.

Every single building, residential or commercial, needs a smoke alarm – bar none!

In most countries, having at least one working smoke alarm on every level of a home is a legal requirement.

In the United States for example, the National Fire Protection Association (NFPA) recommends smoke alarms are fitted inside each bedroom, outside each sleeping area, and on every level of the home, including the basement.

In the UK, Australia, and many other countries, similar laws and recommendations also exist.

Why Test Your Smoke Alarms?

Testing your smoke alarm is the only way to know its working properly.

Even if the unit appears in good working order, components inside can degrade over time.

Batteries can die. Dust or insects can clog the sensors. Wiring can loosen.

A malfunctioning smoke alarm is essentially useless in an emergency.

Fire statistics consistently show that the risk of dying in a home fire is cut in half when working smoke alarms are present.

Regular testing ensures you and your family are alerted in time to escape.

How Often Should I Test My Smoke Alarms?

Woman Testing Smoke Alarm

Experts recommend testing your smoke alarms once a month.

This frequency ensures that any battery issues, sensor faults, or connectivity problems are identified before a real emergency happens.

Here’s some additional maintenance recommendations to remember:

  • Battery-powered alarms: Replace batteries at least once a year, unless the alarm uses a 10-year sealed battery.
  • Hardwired alarms: These are connected to your home’s electricity supply but typically still have a backup battery that needs yearly replacement.
  • All smoke alarms: Replace the entire unit every 10 years, or sooner if the manufacturer recommends it or if the unit fails testing.

Marking these tests on your calendar or making them a part of your monthly routine is an easy way to stay safe.

How to Test a Smoke Alarm

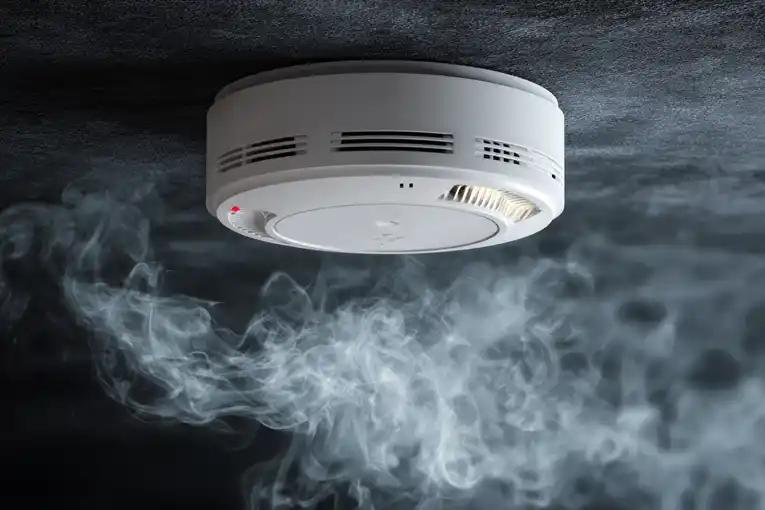
Smoke  Detector
Image credit: Pixabay

Testing a smoke alarm is a very straightforward process, but it varies slightly depending on the type of smoke detection unit you have installed.

Battery Units

  1. Locate the test button: This is usually visible on the front face of the alarm.
  2. Press and hold the button: After a few seconds, the alarm should emit a loud, high-pitched sound.
  3. Listen for consistency: The sound should be continuous and strong. If it’s weak or erratic, replace the battery immediately.
  4. No sound? Replace the battery first, then test again. If there’s still no response, replace the entire unit.

Hardwired Units

  1. Locate the test button: Press and hold the test button exactly as you would on a battery-operated alarm.
  2. Interconnected alarms: If your home has interconnected alarms, pressing the test button on one unit should cause all the alarms to sound. This is normal and confirms they’re correctly linked.
  3. Backup battery: Even though these alarms are connected to mains power, always check the battery backup. If the alarm fails the test and replacing the battery doesn’t fix it, call an electrician to inspect the wiring or replace the unit.

Optional Sensor testing

If you want to test the smoke sensor itself (not just the loudspeaker or battery), you can use a smoke detector test spray.

This creates a safe, simulated smoke environment.

Unless advised by the manufacturer, avoid using real smoke such as candles or matches, as this can contaminate and damage the sensor.

Troubleshooting

If your alarm fails the test or behaves strangely, here’s what to do:

  • Weak or chirping sound: This usually indicates a low battery. Replace it and retest.
  • No sound at all: Try a brand new battery. If still silent, the unit may be faulty.
  • Frequent false alarms: Dust, steam, cooking fumes, or insects can all cause false triggers. Clean the alarm with a vacuum cleaner or soft brush. Avoid using sprays or solvents.
  • Random beeps: Some units beep to signal end-of-life, often every 30 to 60 seconds. Check the label on the back for the recommended replacement date.

Safety Tips

  • Always test your alarms after a vacation or extended period away.
  • If you’re hearing impaired, install smoke alarms with strobe lights or vibration alerts.
  • Avoid painting over smoke alarms since this can block sensors.
  • For rental properties, landlords are usually responsible for installing alarms, but tenants should still test them regularly.
  • Don’t ignore chirps or unusual sounds, since they’re indicators telling you something’s wrong.

Key Takeaways

Testing your smoke alarms is one of the simplest ways to protect everyone in your home.

It takes less than a minute, but it could be the difference between life and death in the event of a fire.

Make it a habit, stay informed, and stay safe.

When testing, press and hold the test button monthly to check your smoke alarm’s function.

Replace all batteries at least annually, or sooner as needed.

Alarms should be fully replaced every 10 years, even if they seem to function properly.

Use some test spray for a more thorough check of the smoke sensor if desired.

And address any beeping, silence, or false alarms promptly. Don’t ignore them.

How to Create a Fire Emergency Evacuation Plan

A fire can break out with little warning, whether you are at home, at work, or in a public place. 

In those critical moments, having a clear fire emergency evacuation plan can save lives by telling everyone exactly how to escape quickly and safely. 

This article will explain what a fire emergency evacuation plan is, when to use it, how to create one step by step, and key tips for making it effective. 

By planning ahead and practising, you can help ensure that if a fire ever happens, you and the people around you can get to safety without panic.

What is a Fire Emergency Evacuation Plan?

what is fire emergency evacuation plan

A fire emergency evacuation plan is a written document or set of instructions that outlines how to get everyone out of a building safely if there is a fire. 

In short, it’s a guide for a quick and orderly escape during a fire emergency. 

A good plan will typically detail the designated escape routes and emergency exits, where people should assemble outside (a safe meeting point), and how to raise the alarm (for example, activating the fire alarm or shouting to alert others), as well as who will contact the fire service. 

It may also assign special roles or responsibilities – for instance, a fire marshal in a workplace might check that everyone is evacuated, or one family member might be in charge of calling the fire service. 

The purpose of a fire emergency evacuation plan is to ensure everyone knows what to do immediately if a fire breaks out, so there’s no confusion or delay when every second counts.

When is a Fire Emergency Evacuation Plan Used?

what is fire emergency evacuation plan used for

A fire emergency evacuation plan is used whenever there is a fire emergency that requires people to evacuate. 

The moment someone discovers a fire or the fire alarm sounds, everyone should follow the plan and start leaving the building to reach safety. 

This applies in all settings, workplaces, schools, shops, healthcare, and even in your own home. 

In an office or school, for example, the plan is often practised during regular fire drills so that if a real fire happens, people are prepared to act quickly and calmly. 

Essentially, any time you need to get out of a building due to a fire (or suspected fire, such as smelling smoke), you will be using your fire emergency evacuation plan. 

It’s the procedure that guides occupants to safety during those critical moments.

How to Create a Fire Emergency Evacuation Plan

Creating a fire emergency evacuation plan involves carefully thinking through how people will escape a fire safely and writing down the procedure. 

Here are the key things your plan should include and consider:

What Should Your Fire Emergency Evacuation Plan Cover?

Your fire evacuation plan should cover all the essential elements needed for a safe escape. 

Important points to include are:

Fire Detection and Alarm

Clearly state the fire detection and how people will be alerted. 

For example, note that there are smoke alarms or a fire alarm system in place and explain how to trigger the alarm (or yell “Fire!”) if someone discovers a fire. 

Also specify who will call the fire service to ensure help is on the way.

Escape Routes and Exits

Identify all the safe ways out and keep them unobstructed. 

Emergency exits should open easily. 

Provide exit signs and, if needed, emergency lighting so people can find their way even in the dark.

Assembly Point

Choose a safe spot outside (such as the far end of the car park or across the street) where everyone will meet. 

Make sure everyone knows where this assembly point is.

Training and Information

Make sure everyone in the building knows what to do. 

Employees should have training on the plan, and household members or roommates should talk through the escape steps. 

People need to be familiar with the plan ahead of time rather than trying to figure it out during an emergency.

Special Assistance

Include provisions for anyone who might need help during evacuation. 

For example, assign someone to assist individuals with limited mobility (such as using an evacuation chair for a wheelchair user), plan how to alert anyone with hearing or vision impairments, and decide who will help young children or the elderly. 

The plan should ensure no one is forgotten or left behind.

What Else Should You Consider?

Beyond the basics above, consider these additional factors to make your evacuation plan as effective as possible:

Action on Discovering a Fire

The plan should state that if anyone discovers a fire, they must immediately raise the alarm and start the evacuation. 

If the fire is very small and a person is trained to use a fire extinguisher, they can attempt to put it out only if it is safe to do so – otherwise, evacuate immediately. 

Remember that getting everyone out safely is the top priority.

Roll Call and Headcount

Your plan should include taking a headcount once everyone is at the assembly point. 

Use a staff register or headcount list to quickly see if everyone is out or if someone might still be inside. 

If anyone is unaccounted for, that information must be given to the fire service immediately when they arrive.

Liaison and Responsibilities

Assign one person to meet the firefighters when they arrive and inform them of crucial details (like if anyone is missing or where the fire is). 

Also, make sure all key roles are decided in advance – for example, who calls 911, who checks various areas, who assists people in need, and who takes the roll call. 

These clear assignments prevent confusion during an evacuation.

Fire Emergency Evacuation Plan Template

While each evacuation plan will be tailored to its location, most plans cover similar ground. 

Here is a simple outline of what a fire emergency evacuation plan document might include:

  • Introduction:  A brief description of the premises and the purpose of the plan (to ensure everyone’s safety during a fire).
  • Alarm and Emergency Contacts: How to raise the alarm and who to call in an emergency (include the fire service number and any key internal contacts).
  • Evacuation Procedures: Step-by-step instructions of what to do when the alarm sounds or a fire is discovered (for example: leave immediately by the nearest exit, do not use lifts, and close doors behind you).
  • Escape Routes and Exits: Details of primary and secondary escape routes for the building (and where maps or exit signs are posted, if applicable).
  • Assembly Point: The specific safe location outside where everyone will gather after evacuating.
  • Roles and Responsibilities: Who does what during the evacuation (for example, who calls 911, who guides people out, who takes attendance at the assembly point).
  • Assisting Vulnerable Persons: How to assist anyone who needs extra help (e.g. people with disabilities, children).
  • Post-Evacuation Actions: For example, note that a roll call will be done at the assembly point and any missing persons will be reported to the fire brigade.

How Often Should You Review Your Fire Emergency Evacuation Plan?

how often review fire emergency evacuation plan

You should review your fire emergency evacuation plan regularly to keep it up to date – at least once a year is a good guideline. 

Over time, things can change that might affect your plan. 

For example, you might renovate or rearrange the space, or new people might join (employees, residents, etc.) who have different needs. 

After any such changes, update the evacuation plan accordingly. 

It’s also wise to review the plan after any fire drill or actual emergency. 

If a drill showed confusion about a particular exit or if an alarm wasn’t heard in some area, you should fix those issues and adjust the plan. 

Regular reviews ensure that escape routes are still clear, contact information is current, and everyone remains familiar with what to do if a fire occurs.

Is a Fire Emergency Evacuation Plan a Legal Requirement?

is fire emergency evacuation plan legal requirement

Yes, in most workplaces and public buildings a fire emergency evacuation plan is a legal requirement. 

Employers and building owners are legally obliged to implement and communicate these plans. 

If you have five or more employees, you are typically expected to have the plan written down as part of your fire risk assessment duties. 

Failing to do so can lead to enforcement actions or fines because it puts people at risk. 

For private homes, a written fire evacuation plan is not required by law, but it’s strongly recommended for your safety.

Fire authorities often encourage families to discuss and practise a home escape plan because it greatly increases the chance of everyone getting out safely. 

So, while you might not be legally required to have a formal fire plan in your house, the law does mandate it for most other settings where people live or work. 

Ultimately, beyond legal compliance, having a fire emergency evacuation plan is a responsible step that protects lives.

Conclusion

You should now have an understanding of how to create a fire emergency evacuation plan

A fire emergency evacuation plan is an essential part of keeping people safe from fire. 

In an emergency, a well-prepared plan can make the difference between a quick, orderly evacuation and dangerous chaos. 

By clearly outlining how to raise the alarm, the nearest exits to use, where to assemble, and who will call for help, it removes uncertainty and panic. 

Remember that for a plan to be effective, everyone needs to know it and it should be kept up to date. 

Whether at your workplace or in your home, taking the time to create and practise a fire evacuation plan can save lives. 

Fires are unpredictable and frightening, but when everyone knows what to do and where to go, the situation becomes much more manageable. 

Being prepared is not only a legal or moral responsibility – it’s also a practical way to protect yourself and others from harm.

10 Most Common Flammable Solids

Flammable solids are materials that ignite easily and burn quickly when they come into contact with heat, sparks, or open flames. 

These materials pose a significant fire hazard because once they catch fire, the flames can spread rapidly and be difficult to control. 

From everyday items like matches and firelighters to more industrial materials like metal powders and phosphorus, these solids are present in many aspects of life. 

That’s why it is essential to understand how they behave, how to store them safely, and what to do in an emergency.

This article explores the definition of a flammable solid, introduces ten of the most common examples, and offers practical safety tips to help reduce fire risks at home and in the workplace.

What is a Flammable Solid?

A flammable solid is a material that can easily catch fire and burn rapidly when exposed to heat, sparks, friction, or an open flame. 

These substances are classified as Class 4 hazardous materials under international transport and safety guidelines because of their high risk of ignition and fire spread.

Flammable solids can be found in many forms, powders, granules, sheets, or even everyday products like matches and firelighters. 

Some are naturally combustible, while others become dangerous when exposed to air, moisture, or certain chemicals. 

They are often used in industrial processes, laboratories, manufacturing, and even in household products, making them more common than many people realise.

The main danger with flammable solids lies in how quickly they can ignite and how fiercely they can burn. 

For example, powdered metals like aluminium or magnesium can burn extremely fast and even explode when airborne. 

Others, like phosphorus or alkali metals, can self-ignite when exposed to air or water.

Flammable solids are grouped into three categories for safety purposes:

  • Division 4.1: Flammable solids (e.g. matches, sulphur)
  • Division 4.2: Substances liable to spontaneous combustion (e.g. phosphorus)
  • Division 4.3: Substances that emit flammable gas when in contact with water (e.g. sodium)

Because of their fire risk, these materials must be stored, handled, and transported with extreme care. 

Understanding what flammable solids are, and how they behave, is key to preventing dangerous fires and accidents.

10 Most Common Flammable Solids

Flammable solids are materials that catch fire easily and burn rapidly. 

They are found in homes, workplaces, and industries, and can become extremely dangerous if handled carelessly. 

Below are ten of the most common flammable solids, including how they behave and why they require careful attention.

Alkali Metals

sodium alkali metal
Source: Wikipedia

Alkali metals include elements such as lithium, sodium, potassium, and rubidium. 

These metals are highly reactive and are known to ignite spontaneously in air or explode on contact with water.

When exposed to moisture, alkali metals produce hydrogen gas and heat, which can cause immediate ignition. 

For example, a small piece of sodium dropped into water will fizz, spark, and potentially explode. 

These reactions are not just spectacular, they are highly dangerous.

Alkali metals are used in batteries, research labs, and chemical manufacturing. 

Because of their reactivity, they are stored under oil or in sealed containers to prevent exposure to air or water.

Celluloid

celluloid film
Source: Wikipedia

Celluloid is one of the earliest types of plastic, made by combining nitrocellulose with camphor. 

It was once used widely in film reels, combs, toys, and even dentures. 

However, celluloid is highly flammable and can ignite from just a small amount of heat or friction.

When it burns, it produces a fast, intense flame that is difficult to control. 

Early cinema fires were often caused by celluloid film catching fire under the heat of a projector bulb.

Today, celluloid has been largely replaced by safer materials, but it still appears in some vintage items. 

It should always be kept away from heat and stored in well-ventilated areas.

Coal

coal

Coal is a black or brownish-black rock made of carbon-rich material. 

It has been used as a fuel source for centuries, particularly in power stations, homes, and industrial processes.

Although solid coal is relatively stable, coal dust is extremely flammable. 

Fine coal particles suspended in air can create explosive mixtures, especially in enclosed spaces like mines or silos.

Fires involving coal are hard to extinguish once started. 

They can smoulder deep within coal piles for days or weeks. 

Good ventilation and dust control are essential in environments where coal is stored or used.

Firelighters

firelighter
Source: Wikipedia

Firelighters are small blocks or cubes made from flammable substances such as paraffin wax, kerosene, or compressed wood and oil. 

They are designed to catch fire easily and help light barbecues, wood burners, or campfires.

While firelighters are very useful, they must be handled with care. 

Storing them near open flames or in high temperatures can lead to accidental fires. 

Some types release flammable vapours that can ignite suddenly.

Always store firelighters in a cool, dry place and use them as instructed. 

Keep them out of reach of children and never use them to revive a dying fire, they can flash back dangerously.

Matches

burning match
Source: Wikipedia

Matches are perhaps the most familiar flammable solid. 

They consist of a small wooden or cardboard stick tipped with chemicals that ignite when struck.

The match head typically contains potassium chlorate, sulphur, and other substances. 

When struck against the matchbox surface, friction produces enough heat to ignite the chemicals and start a flame.

Because they are so easy to light, matches are considered hazardous goods. 

They should be kept in their original packaging, stored away from heat, and handled responsibly. 

Used matches should be fully extinguished and disposed of safely.

Metal Powders

metal powder

Fine metal powders such as aluminium, magnesium, titanium, and zirconium are highly flammable, especially when dispersed in air.

These powders are used in fireworks, pyrotechnics, welding, and metal finishing. 

When airborne, they can form explosive mixtures that ignite with a single spark. 

Magnesium powder, for example, burns at extremely high temperatures and can cause severe burns or fires.

To reduce the risk of explosions, metal powders must be stored in tightly sealed containers in non-sparking environments. 

Dust should be cleaned using specialised vacuum systems, and equipment should be grounded to prevent static electricity.

Phosphorus

black phosphorus
Source: Wikipedia

Phosphorus exists in several forms, but white phosphorus is the most flammable. 

It ignites spontaneously in air and burns with a bright, white flame. 

Because of this, white phosphorus is stored underwater or in sealed containers to prevent exposure to oxygen.

Phosphorus is used in military applications, chemical manufacturing, and fertilisers. 

It’s also found in small amounts in some matches and fireworks.

Even brief contact with white phosphorus can cause serious burns. 

It also releases toxic fumes when it burns, making it dangerous to inhale. 

Red phosphorus is more stable but can still ignite under friction or heat.

Seed Cake

seed cake
Source: Wikipedia

Seed cake is the solid by-product left after oil is extracted from oil-rich seeds, such as linseed, sunflower, or cottonseed. 

Although it may look harmless, seed cake can catch fire spontaneously during storage.

Residual oils within the cake can oxidise over time, generating heat. 

If the heat isn’t allowed to escape, due to poor ventilation or compact storage, it can build up until the seed cake catches fire on its own.

Seed cake is often used as animal feed or fertiliser. 

It must be stored in cool, dry conditions and checked regularly for signs of heating or smoke. 

Fires in seed cake storage can spread quickly once started.

Sodium Batteries

sodium batteries
Source: Wikipedia

Sodium batteries are known for high energy storage but also come with fire risks. 

They contain sodium metal, which reacts violently with water and moisture.

If the battery casing is damaged or the battery overheats, the sodium can ignite, causing intense fires. 

In worst cases, the battery may explode or leak hot, flammable materials.

Sodium batteries are used in large-scale energy storage and some newer electric vehicle concepts. 

Because of their high energy and fire potential, they require robust safety systems, temperature controls, and fire-resistant housing.

Sulphur

sulphur
Source: Wikipedia

Sulphur is a yellow, non-metallic element found in nature and used in many industrial processes, including the production of sulphuric acid, fertilisers, and matches.

When heated, sulphur melts into a reddish liquid and eventually ignites, burning with a blue flame and producing sulphur dioxide gas. 

This gas is toxic and irritating to the eyes, nose, and throat.

Sulphur fires can be difficult to put out and produce large amounts of smoke. 

In powder form, it poses an even greater fire risk, as it can ignite easily and burn rapidly.

To handle sulphur safely, store it in well-ventilated areas away from heat or open flames, and avoid creating dust clouds when moving or processing the material.

How to Protect Yourself from Common Flammable Solids

Flammable solids can pose serious fire hazards if not handled with care. 

Whether you’re working with these materials in an industrial setting or storing them at home, following simple safety steps can reduce the risk of accidents.

Store Properly

Keep flammable solids in cool, dry, and well-ventilated areas. 

Avoid places with direct sunlight, heat sources, or open flames. 

Always store materials in containers specifically designed for hazardous goods, and ensure lids are sealed tightly to prevent spills and contamination.

Use the Right Equipment

When handling flammable solids, wear appropriate personal protective equipment (PPE)

This includes gloves, eye protection, flame-resistant clothing, and sometimes respirators if there is dust or fumes. 

Using the right tools, such as non-sparking scoops or containers, can also help prevent accidental ignition.

Separate Incompatible Materials

Some flammable solids react dangerously with other substances, including water or certain chemicals. 

Keep incompatible materials stored separately and clearly label all containers. 

Consult safety data sheets (SDS) for guidance on proper segregation.

Prevent Dust Buildup

Fine powders like metal dust or coal can ignite easily when dispersed in air. 

Regularly clean work areas to prevent dust accumulation, and avoid sweeping, which can stir up particles – use a vacuum with a HEPA filter instead.

Train and Educate

Make sure everyone handling these materials receives proper training

Staff should know how to store, handle, and dispose of flammable solids safely. 

Emergency procedures should be clearly displayed, and fire extinguishers or other firefighting tools should be easily accessible.

Conclusion

You should now have more of an understanding of common flammable solids. 

Flammable solids present serious fire risks, especially when they are mishandled, stored incorrectly, or exposed to heat, sparks, or open flames. 

Each flammable solid has unique properties, ignition points, and hazards. 

Some, like celluloid or metal powders, can ignite with friction or static discharge. 

Others, such as seed cake or coal, may combust spontaneously under the right conditions. 

Being aware of these differences helps individuals and businesses store and handle these substances more responsibly.

By respecting the dangers and taking the right precautions, we can use these materials safely and avoid potentially life-threatening incidents.

How Do Wildfires Start?

Wildfires are one of the most powerful and destructive natural events on Earth. 

They can sweep through forests, grasslands, and even towns with alarming speed, leaving devastation behind. 

While wildfires are often seen in news headlines, many people don’t fully understand how they begin or why they spread so quickly. 

So how do wildfires start?

Some start naturally, while others are caused by human activity. 

In recent years, rising global temperatures and longer dry seasons have made these fires more frequent and harder to control. 

This article will explain what wildfires are, how they start, why they’re so dangerous, and how we can help prevent them.

What is a Wildfire?

what are wildfires

In simple terms, a wildfire is an out-of-control fire in forests, grasslands, brush or moorland. 

Depending on where they happen, they might also be called forest fires or bushfires. 

Unlike a campfire or a planned garden bonfire, a wildfire spreads through natural landscapes without deliberate management. 

Once ignited, a wildfire can quickly burn trees, shrubs, grass and the organic litter on the forest floor if dry fuel and wind are present. 

While the word ‘wildfire’ sounds threatening, it’s important to know that fires can be a natural part of many ecosystems. 

In small doses, fires can clear away old vegetation, kill disease-carrying insects, and help new plants grow. 

In fact, some forests and grasslands rely on occasional fires to stay healthy. 

However, today’s major wildfires are often larger and faster-spreading than the fires of the past. 

They can burn over huge areas of land before they finally stop. 

Such large fires can cause severe damage to wildlife and habitats and take decades for the land to recover.

How Do Wildfires Start?

Wildfires can be started by either natural or human causes:

Natural Causes

how do natural wildfires start

Natural events can trigger wildfires. 

The most common natural cause is lightning strikes. 

When a lightning bolt hits a tree, dry grass or the ground, it can instantly ignite a fire.

For example, during a single week in August 2020, more than 12,000 lightning strikes caused over 650 separate wildfires in California, burning more than 1.5 million acres. 

Other natural ignitions are less common but still possible. 

Volcanic eruptions can start wildfires: when lava flows over forested land, it sets vegetation alight. 

Another rare cause is spontaneous combustion in piles of dry leaves or compost. 

As rotting plant material breaks down, it can heat up and if a pile of leaves or manure gets hot enough, it can burst into flames without any spark. 

These natural causes do happen, but compared to human-related starts they account for only a small fraction of wildfires.

Human Causes

how do man made wildfires start

Humans are responsible for most wildfires. 

Careless or malicious actions can provide the spark that ignites dry vegetation. 

Key human causes include:

Arson

Sadly, some fires are set on purpose. 

People may set fires for various motives, such as land clearing or vandalism. 

In the United States alone, a study found over 52,000 intentional wildfires between 2014 and 2018

These arson fires led to an estimated 400 deaths, 950 injuries and about $815 million in damage every year.

Campfires and Barbecues

An unattended or poorly extinguished fire at a campsite or picnic can easily grow into a wildfire. 

For example, the 2007 Ham Lake fire in Minnesota (USA) was traced to a campfire left burning on the Gunflint Trail. 

It ended up burning 75,000 acres of forest and destroying hundreds of properties. 

Always make sure any outdoor fire is completely out before you leave it.

Burning Debris

People sometimes burn garden waste or bonfire piles. 

If conditions are windy or dry, the fire can escape. 

Sparks or embers from a debris burn may drift into nearby fields or forests and ignite new fires. 

Even if a fire looks like it’s out, smoldering embers can be carried by wind to start a new blaze.

Equipment and Machinery

Sparks from equipment can start fires. 

Faulty power lines cause many wildfires. 

In California, broken power wires are linked to about 10% of wildfires each year

Farm machines, chain saws or car brakes can also throw off sparks. 

For instance, the 2007 Zaca Fire (California) began when a metal grinder hit a rock and sent a spark into dry grass. 

Discarded Cigarettes and Matches

A lit cigarette butt tossed from a car window or from a building can land on dry grass and start a fire. 

Even small careless acts like this add up.

Other Causes

Fireworks, sky lanterns, or even broken glass bottles can focus sunlight and ignite grass. 

Anything that produces heat or sparks in a dry environment can become the start of a wildfire.

Why are Wildfires so Dangerous?

why are wildfires dangerous

Wildfires can grow extremely fast and spread over wide areas, making them very dangerous to people and nature. 

Even trained firefighters can be overwhelmed by the speed of a wildfire. 

Such fires can force evacuations of whole villages and towns, destroying homes and property in their path. 

Environment

Wildfires also have terrible effects on the environment. 

They can kill animals and destroy habitats. 

Entire forests can be turned to ash, and recovering from this damage can take decades. 

Many plants and animals lose their homes and food sources. 

Fires also release pollution and carbon dioxide. 

Trees normally store carbon from the air, but when they burn that carbon goes back into the atmosphere. 

A single large fire can emit as much carbon as many years of a city’s car traffic. 

In fact, studies have shown wildfires can release huge amounts of greenhouse gases, making climate change worse. 

This creates a feedback loop: hotter climate increases fire risk, and fires in turn boost the climate problem. 

Smoke

One of the most serious dangers is wildfire smoke. 

Smoke carries tiny particles of ash and chemicals that can travel long distances on the wind. 

It can make the air unsafe to breathe, even in places far from the fire itself. 

For example, smoke from North American wildfires in 2024 drifted across the Atlantic and reddened skies in the UK

Locally, smoke causes serious health problems: it aggravates asthma, heart disease and other conditions, and can trigger hospital admissions. 

Economy

Wildfires also have a large economic cost. 

The effort of firefighting can run into the hundreds of millions. 

Rebuilding after a fire, repairing homes, clearing burnt trees, restoring utilities, costs even more. 

Worldwide, the annual economic losses due to wildfires are in the tens of billions of pounds. 

Flooding and Landslides

Finally, wildfires can increase risk of flooding and landslides after they are out. 

The heat often soaks into soil and makes it hard for rain to seep in. 

Then heavy rains can wash ash, mud and debris downhill very quickly, causing flash floods or landslides. 

In this way, wildfires can trigger new hazards even after the flames are gone.

Can Weather Affect Wildfires?

Weather and climate have a huge impact on wildfires. 

Droughts & Heatwaves

In general, hot, dry and windy conditions make wildfires more likely and more severe. 

Droughts and heat waves dry out trees, grass and soil, turning once-green vegetation into brown tinder. 

Heatwaves in Europe or North America have repeatedly led to record-breaking fires. 

Scientists have linked this to climate change: by making heatwaves hotter and droughts longer, climate change is lengthening the fire season. 

On the other hand, cold or rainy weather helps to prevent fires; a period of heavy rain will soak vegetation and greatly reduce fire risk. 

Wind

Wind deserves special mention. 

Strong winds can carry burning embers miles ahead of the main fire, starting spot-fires that are very hard to contain. 

Winds also fan flames, supplying them with oxygen and pushing the fire front forward rapidly. 

Even gentle breezes on a very dry day can make a fire spread much faster. 

By contrast, still, humid air is much less favourable to fire growth. 

Recent weather patterns have already increased wildfire risk. 

How to Help Prevent Wildfires

how to prevent wildfires

Preventing wildfires is something everyone can help with. 

Most wildfires could be avoided if people behaved responsibly when using fire outdoors. 

The key is to avoid providing sparks or flames when conditions are dry. 

For example:

Be Careful With Open Flames

Never leave a campfire, bonfire or barbecue unattended. 

Keep them small, use a proper fire ring or container if available, and always have a bucket of water or a hose nearby. 

When you’re done, douse the fire completely with water and stir the ashes until no smoke or heat remains. 

This ensures hidden embers don’t flare up later.

Dispose of Smoking Materials Safely

Do not drop cigarette butts, matches or lighters onto the ground. 

A lit cigarette can smoulder unseen and ignite dry grass. 

Always put out cigarettes fully in a stubber or an ashtray, and never throw them out of car windows.

Avoid Fire in High Risk Areas

In hot, dry weather do not light any kind of flame in parks, forests or open countryside. 

That includes barbecues, as they can easily start grass fires. 

Equally, say no to fireworks or sky lanterns on dry days. 

These may seem harmless, but any spark they produce in a dry field can ignite a wildfire.

Position Equipment Safely 

If you barbecue, place the grill on a flat non-flammable surface (not on grass or decking). 

Keep it well away from hedges, fences or trees, and have water handy. 

Never use petrol or other flammable accelerants. 

When you finish cooking, make sure the fire is fully out and cool before disposing of ashes.

Follow Local Guidance

Many areas issue fire danger warnings or total fire bans during very dry spells. 

Check local advice and follow any restrictions. 

If a ban is in place, do not light even a small fire. 

Also clear leaf litter and long grass from around homes and outbuildings to create a safety zone – this ‘defensible space’ can stop fires from reaching buildings.

In forest areas, leaving dead wood on the ground or allowing undergrowth to build up can turn small sparks into major fires, so controlled clearing can help. 

Report Fires Quickly

If you see a fire starting, do not assume someone else will call for help. 

Call the emergency services immediately with the location. 

Give clear information about where the fire is, what it looks like, and if it is spreading. 

Early reporting allows firefighters to respond fast before the fire grows out of control.

Conclusion 

You should now have more of an understanding of how wildfires start.

Wildfires are complex natural disasters with many causes, but with awareness and care we can reduce their impact. 

We have seen that wildfires can start from nature or human actions. 

Weather and climate play a key role with hot, dry, windy conditions making fires far more likely. 

However, each of us can help prevent them. 

By following simple precautions – never leaving fires unattended, disposing of cigarettes safely, heeding fire bans and clearing dry vegetation.

Understanding wildfires helps us live more safely with them. 

Although wildfires will never disappear entirely, training people to act responsibly and learning about wildfire causes and fire weather can greatly reduce the risk. 

After all, it only takes one spark to start a wildfire, but many small actions to prevent one.

What is a Fourth Degree Burn?

Burn injuries are among the most painful and complex wounds a person can experience. 

They are classified by degrees of severity, from minor first degree burns that affect only the outer layer of the skin, to life-threatening fourth degree burns that damage deeper tissues beneath the skin. 

While most people are familiar with first, second, and third degree burns, fourth degree burns are far less common and far more serious.

A fourth degree burn goes beyond the skin’s surface, destroying the underlying fat, muscle, and even bone. 

Understanding the nature of a fourth degree burn is vital, not just for medical professionals, but for the general public as well. 

Quick action can be the difference between life and death. 

In this article, we will explore what exactly a fourth degree burn is, how it differs from other types of burns, what causes it, how it’s treated, and what recovery looks like.

What is a Fourth Degree Burn?

what is fourth degree burn

A fourth degree burn is the most severe type of burn injury. 

It goes beyond damaging just the skin and affects deeper layers of tissue, including fat, muscles, tendons, and even bone. 

At this level, the burn completely destroys both the outer (epidermis) and inner (dermis) layers of skin, leaving the affected area blackened, charred, or dry and white in appearance.

Because fourth degree burns damage nerves, the injured area may not be painful at first. This absence of pain does not mean the injury is minor, it is often a sign that the nerve endings have been destroyed. 

These burns are usually caused by prolonged exposure to intense heat, open flames, electricity, or strong chemicals.

Due to the depth of tissue damage, fourth degree burns can lead to serious complications, such as infection, fluid loss, shock, and organ failure. 

Immediate medical treatment is essential. 

These burns often require surgery, including skin grafts or even amputation in severe cases.

What Are The Most Common Causes of a Fourth Degree Burn?

fourth degree burn causes

Fourth degree burns are serious injuries that occur when the body is exposed to extreme heat or harmful substances for a prolonged period. 

These burns go beyond the skin and affect deeper tissues, such as fat, muscle, and bone. Below are the most common causes.

Prolonged Exposure to Fire or Flames

One of the leading causes of fourth degree burns is prolonged contact with open flames. 

This often occurs in house fires, vehicle accidents, or industrial incidents where escape is delayed. 

Clothing can catch fire, holding heat against the skin and allowing the burn to penetrate deep into the body.

High-Voltage Electrical Injuries

Electrical burns, especially from high-voltage sources, can cause fourth degree burns. 

Electricity generates intense heat as it travels through the body, burning internal tissues even if the skin appears only mildly affected. 

This type of injury is common in construction sites, industrial settings, and electrical accidents.
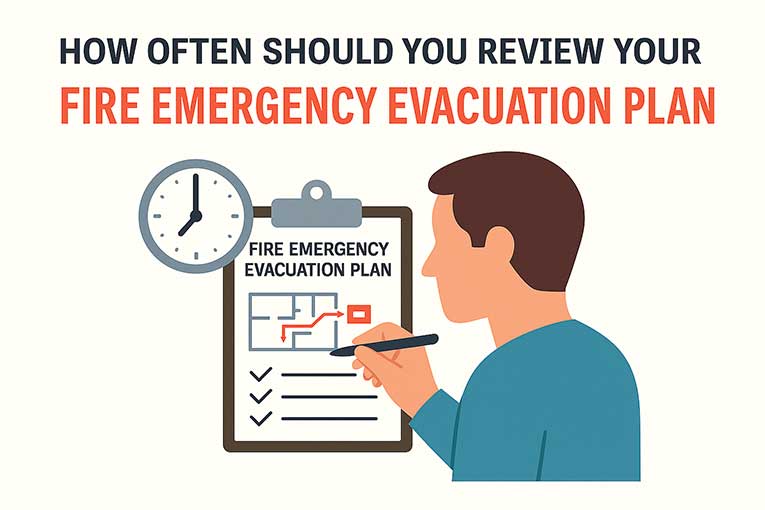
Contact with Strong Chemicals

Exposure to strong acids or alkalis, such as industrial cleaning agents or corrosive substances, can lead to deep tissue burns. 

Chemical burns can continue to damage the skin and tissue long after the initial contact if not washed off quickly and thoroughly.

Severe Friction Burns

Friction burns occur when the skin rubs against a rough surface at high speed, such as in motorcycle accidents or being dragged across a hard surface. 

If the contact is strong and long enough, it can lead to fourth degree burns that extend into muscle and bone.

Radiation Exposure

Though less common, extremely high doses of radiation, such as in industrial accidents or overexposure during radiation therapy, can damage tissue layers beyond the skin, resulting in deep burns.

How Is a Fourth Degree Burn Different to Other Types of Burns?

classifications of burns
Source: Wikipedia

There are different classifications of burns, based on their severity. 

Fourth degree burns are the most severe, causing destruction far beyond what is seen in first, second, or even third degree burns.

Here’s how fourth degree burns compare to other burn types:

First  Degree Burns

First degree burns affect only the outermost layer of skin, known as the epidermis.

The area becomes red, sore, and dry, with mild swelling.

Pain is usually present, but the burn typically heals within a week without scarring.

Second Degree Burns

Second degree burns reach into the second skin layer, the dermis.

They cause blisters, intense pain, and swelling.

Healing may take several weeks, and scarring is possible, depending on the depth.

Third Degree Burns

Third degree burns destroy both the epidermis and dermis.

The skin may appear white, blackened, or leathery.

Because nerve endings are damaged, the area may feel numb.

These burns often require skin grafts and leave permanent scars.

Fourth Degree Burns

Fourth degree burns extend through all layers of skin and into the underlying fat, muscle, and bone.

These burns are usually painless at the site due to complete nerve destruction.

The affected area may look charred, blackened, or dry and white.

They require immediate emergency treatment, often involve surgery or amputation, and result in long-term disability, permanent scarring, and significant functional loss.

How is a Fourth Degree Burn Treated?

fourth degree burn treatments

Treating a fourth degree burn is a complex and urgent medical task. 

Because these burns affect all layers of skin and deeper tissues such as fat, muscle, and even bone, they require immediate and specialist care. 

Treatment usually begins in an emergency department or burn unit.

The first step is to stabilise the patient. 

Doctors will assess the extent of the burn, manage pain, and prevent or treat shock. 

Intravenous fluids are given to prevent dehydration and maintain blood pressure. 

Antibiotics may also be used to prevent infection, which is a major risk with deep burns.

Next, dead or damaged tissue must be removed through a process called debridement. 

This helps the wound heal and reduces the chance of infection. 

Skin grafts are often needed to replace damaged tissue. 

In very severe cases, amputation of affected limbs may be necessary.

Ongoing treatment may include reconstructive surgery, physical therapy, and occupational therapy to restore movement and strength. 

Due to the trauma of the injury, psychological support is also a vital part of recovery.

Patients with fourth degree burns typically require long-term hospital care, including time in an intensive care or specialist burn unit. 

Early and aggressive treatment at a healthcare facility is essential for improving survival and long-term outcomes. 

Without it, fourth degree burns can lead to life-threatening complications and permanent disability.

How Long Does a Fourth Degree Burn Take to Heal?

Healing from a fourth degree burn is a long and complex process. 

These burns destroy all layers of the skin and reach into deeper tissues such as fat, muscle, and even bone. 

Because of this severe damage, the body cannot heal on its own without major medical intervention.

The initial hospital stay can last several weeks to months, depending on the size and location of the burn and whether complications arise. 

During this time, the patient may undergo multiple surgeries, such as debridement (removal of dead tissue) and skin grafts. 

In some cases, amputations or reconstructive surgery may also be required.

Even after leaving the hospital, long-term recovery continues. 

Physical therapy is often needed to regain movement, particularly if joints or muscles are affected. 

Patients may also need occupational therapy, psychological support, and regular check-ups to monitor healing.

Full recovery can take many months or even years. 

The exact timeline varies depending on the person’s age, overall health, and how quickly they respond to treatment. 

Some people may face lifelong challenges, including scarring, reduced mobility, or chronic pain.

Does a Fourth Degree Burn Scar?

Yes, a fourth degree burn almost always leaves significant scarring. 

Because this type of burn destroys all layers of the skin and extends into underlying tissues such as fat, muscle, and bone, the damage is permanent and severe. 

As the skin cannot heal naturally in these cases, scarring is an unavoidable part of the recovery process.

The scars from fourth degree burns are often deep, large, and discoloured. 

They may appear raised, tight, or shiny, and can be either lighter or darker than the surrounding skin. 

Common types of scarring include hypertrophic scars, which are thick and red but remain within the wound area, and keloid scars, which grow beyond the boundaries of the original injury.

In addition to scarring, many patients develop contractures, where the skin and underlying tissues tighten and restrict movement, especially when burns are near joints. 

This can affect mobility and lead to long-term physical difficulties.

To manage scarring, patients may undergo treatments such as pressure garments, silicone gel sheets, steroid injections, and in some cases, reconstructive surgery. 

While these methods can reduce the appearance and discomfort of scars, they cannot remove them entirely.

Emotional and psychological support is also important, as scarring can impact confidence and mental wellbeing.

Conclusion

You should now have an understanding of what a fourth degree burn is. 

Fourth degree burns are among the most devastating and life-threatening injuries a person can suffer. 

This level of damage can result in permanent disability, disfigurement, and, in the most severe cases, death. 

Recovery is rarely straightforward and often requires months or even years of intensive medical care, surgeries, and physical rehabilitation.

Immediate medical intervention is essential. 

The faster a patient receives professional care, the better the chances of stabilising their condition, preventing infections, and beginning the long road to recovery. 

Fire safety education, use of protective gear, and better awareness of hazards can all play a role in prevention.