Fire doorset testing: Why integrated fire resistance and smoke leakage testing matters

Peter Barker of Element Materials Technology explains how integrated fire doorset testing helps manufacturers demonstrate fire resistance, smoke leakage performance and prepare for future EN classification requirements

Fire-resisting doorsets play an important role in compartmentation, helping to limit the spread of fire and smoke throughout a building. Fire resistance has traditionally been perceived as the primary performance characteristic for fire doors, but smoke control is coming into sharper focus when assessing how a doorset performs as a complete assembly.

The planned withdrawal of BS 476 classifications from Approved Document B in September 2029 and adoption of EN-based classification is prompting manufacturers to review how fire and smoke performance is evidenced and classified.

For many manufacturers, that means taking a more joined-up approach to testing, combining fire resistance and smoke leakage programmes to build a clearer picture of overall doorset performance.

Why fire doorset testing is changing

Smoke leakage testing has traditionally focused on sealing systems fitted to the head and jambs of a doorset.

While that approach remains aligned with the current regulatory guidance for smoke control doors, there is now greater attention on understanding the performance of the complete assembly, including how smoke may pass through gaps at the threshold.

More recent guidance, such as BS 8214:2026 has encouraged wider consideration of threshold sealing and the contribution that the bottom gap can make to smoke leakage.

This reflects a broader move towards assessing the complete doorset rather than individual components and ensuring performance clearly links to realworld applications.

Smoke leakage testing and complete doorset performance

Many organisations still approach smoke leakage testing and fire resistance testing through separate programmes. There can be good reasons for working in this way. Product development rarely follows a straight line and designs can evolve.

However, the risk of working in this way is that important design details may be missed that need to be evaluated for both fire and smoke performance characteristics.

The result is that when smoke leakage testing has been carried out on one design and fire resistance testing on another, additional work may be required to establish how those results apply to the final doorset being offered to the market.

The process can become even more complicated when multiple product variations, sizes or hardware options are involved. Manufacturers may find themselves managing several test reports, assessments and supporting documents to demonstrate that a doorset can deliver both fire resistance and smoke control performance.

Benefits of integrated fire doorset testing

Planning smoke leakage and fire resistance testing together in a coordinated programme reduces duplication, testing schedules and project management activities. It can also help manufacturers build a more coherent technical package while reducing the risk of gaps emerging later in the process.

This becomes particularly valuable when results are intended to support extended field of application reports and classifications using the EN 13501-2 framework for doorsets. Integrated programmes can also provide greater confidence when supporting future product developments, particularly where manufacturers plan to introduce additional sizes, hardware arrangements or design variations.

Integrated testing at Warringtonfire Birchwood

Demand for more joined-up testing programmes is one of the reasons Element has expanded its smoke leakage testing capability at the Warringtonfire Birchwood facility. The facility forms part of Element’s £24 million investment in fire testing infrastructure and was opened in January 2025 to support growing demand for construction product testing.

The site includes an indicative furnace for small-scale rapid testing, as well as two horizontal furnaces, two vertical furnaces and 18 preparation bays including confidentiality shields, providing capacity to support a broad range of testing requirements.

Dedicated witnessing facilities and meeting spaces also allow manufacturers to work closely with technical specialists throughout a programme. It also includes a solution that enables both fire resistance and smoke leakage testing from a single test buildup, providing manufacturers with performance data more efficiently.

The addition of smoke leakage testing allows manufacturers to access both fire and smoke testing for doorsets through a single facility and technical team. Alongside testing, Warringtonfire also provides support with technical assessments, extended field of application reports and classification services, helping manufacturers build a clearer route from testing through to the final evidence package.

Preparing for future fire doorset classification

Establishing the fire resistance performance of doorsets remains fundamental, however organisations are increasingly being asked to demonstrate how complete doorset assemblies perform across a range of characteristics, including smoke control.

Testing is also being considered alongside other conformity assessment activities, including sampling, factory production control and audit testing which are designed to provide added assurance of product performance and form the basis of accredited third-party certification schemes, such as Q-Mark and Certifire.

The Warringtonfire-Birchwood facility provides Fire doorset testing

Manufacturers are being asked not only to demonstrate how products perform, but also how that performance is evidenced and maintained throughout the supply chain. Early engagement with testing specialists is also important.

By discussing intended applications, certification objectives and future product development plans before a programme begins, manufacturers can identify potential limitations and opportunities much earlier in the process.

In many cases, this helps avoid additional cost, project delays and unplanned testing further down the line. By considering fire resistance and smoke leakage together from the outset, organisations can simplify assessment and classification activities while building stronger foundations for future product development.

Supporting manufacturers from fire doorset testing to classification

The Warringtonfire Birchwood facility provides fire resistance testing, smoke leakage testing, technical assessment, extended field of application and classification support from a single location.

Whether the objective is supporting a new product launch, extending an existing product range or preparing for future classification requirements, Warringtonfire’s technical specialists can help develop testing programmes aligned with commercial and compliance objectives.

To find out more about Warringtonfire’s fire resistance and smoke leakage testing services at Birchwood, visit warringtonfire.com to discuss your requirements.

Dangers of Overloading Electrical Sockets

Plugging too many devices into one plug socket might seem harmless, yet it poses a serious hazard in homes. 

Many of us have been tempted to cram an extra gadget into a multi-plug adaptor, but that ‘just one more’ could be one too many if it leads to an overloading electrical sockets. 

Overloaded sockets are a leading cause of home electrical fires

That means thousands of families suffer preventable fires due to something as simple as an overburdened outlet. 

This article explains what socket overloading means, why it’s dangerous, real examples of the risks, and practical tips to stay safe. 

Being aware of the dangers of overloading electrical sockets can help you protect your home and loved ones from a very real hazard.

What is Overloading Electrical Sockets?

what is overloading electrical sockets

Overloading electrical sockets means drawing more current through a socket than it is designed to handle. 

A standard wall socket in the UK is rated for about 13 amps of current at most. 

If you plug in appliances whose combined demand exceeds that limit, the socket and wiring can overheat. 

People often accidentally overload sockets by using multi-way adaptors or extension leads to connect multiple appliances to one socket. 

For example, running several high-wattage appliances, such as a heater, kettle, and hair dryer, from a single socket at the same time can quickly push the load beyond safe levels. 

It’s important to realise that even if an extension strip has four or six outlet holes, they all feed from one wall socket.

This means the overall limit is still 13 A in total. 

Having more sockets available on a strip does not increase the amount of power the wall supply can safely provide. 

The excess current drawn through by overloading electrical sockets produces heat in the wires, plug, and socket itself. 

Over time this heat can melt insulation, damage the outlet, or even start a fire.

Dangers of Overloading Electrical Sockets

overloading electrical sockets dangers

Overloading electrical sockets can have many serious dangers.

These can include:

Fires

The primary danger of an overloaded socket is the risk of fire. 

When a socket is overburdened, the electrical cables and components can get extremely hot. 

This overheating can melt plastic plugs, scorch socket covers, and ignite nearby materials. 

Worryingly, electrical fires often start hidden behind walls or around sockets, so you might not notice the problem until a fire has already taken hold. 

Once an electrical fire starts, it can spread quickly and release toxic smoke, endangering anyone inside.

Damaged Wiring

Even if a fire doesn’t break out immediately, excess heat will still damage your wiring and devices. 

The internal wiring of the socket or extension lead can become charred or lose its insulation due to the heat, making it unsafe for future use. 

Electric Shocks

Overloading electrical sockets may have melted components that expose live electrical parts.

This can create a risk of electric shock the next time someone touches or uses them. 

Sensitive electronics plugged into an overloaded socket can also be harmed.

The stress on the circuit might cause voltage fluctuations that shorten the life of appliances or even destroy them. 

Blown Fuses and Tripped Circuit Breakers

Additionally, repeatedly overloading electrical sockets may cause fuses to blow or circuit breakers to trip frequently. 

While these safety devices are meant to protect you, continually tripping the power can weaken a circuit breaker over time, potentially reducing its effectiveness. 

If a breaker or fuse ever fails to trip when it should, an overload can go unchecked and lead to wiring overheating to dangerous levels. 

Cost of Repairs

Beyond the immediate safety hazards, the aftermath of an electrical overload can be devastating financially, from repairing burnt wiring to replacing lost belongings if a fire destroys part of your home. 

How to Avoid Overloading Electrical Sockets

how to avoid overloading electrical sockets

Preventing overloading electrical sockets is straightforward with some simple precautions. 

Here are a few practical tips to avoid overloading your electrical sockets:

One Plug Per Socket When Possible

Stick to one appliance per wall socket, especially for high-power devices. 

High-wattage appliances like microwaves, washing machines, or space heaters should each have their own dedicated socket.

Don’t Daisy-chain Extensions

Never plug one extension lead into another, known as ‘daisy chaining’. 

Using a single multi-way extension strip is acceptable within its capacity, but linking extensions together greatly increases the risk of overload and fire.

Use the Right Type of Adaptor

If you need to plug in multiple low-power items, use a good-quality bar extension strip with a built-in fuse or surge protector. 

Avoid cube-shaped block adaptors that lack fuses as these can overheat more easily.

Know Your Limits

Check the rating of extension leads and adaptors and add up the amperage of all devices you’re connecting. 

Do not exceed the maximum current indicated. 

If in doubt, you can use a socket overload calculator to double-check that your planned combination of devices stays within safe limits. 

Remember that 13 amps is roughly equal to 3,000 watts at UK mains voltage, which is easily reached by just a couple of high-power appliances.

Unplug Devices When Not in Use

Disconnect appliances or chargers that you’re not actively using. 

This reduces unnecessary load on the socket and minimises the risk of overheating. 

It’s especially important to switch off and unplug items like portable heaters or phone chargers overnight or when you leave the house.

Uncoil Extension Reels Fully

If you use a coiled extension cable, always unwind it completely before use. 

A coiled power cable can act like a heating element and overheat if left bundled, even if you’re drawing what would normally be a safe amount of current.

Install More Outlets if Needed

If you find you’re constantly juggling plugs or relying on extension leads daily, consider having a qualified electrician install additional wall sockets in high-use areas. 

This permanent fix can eliminate the temptation to overload a single outlet.

Be Alert to Warning Signs

Training yourself to understand overloading warning signs is a must.

Stop using a socket immediately if you notice signs of overload such as plugs that feel hot, a smell of burning plastic, scorch marks around the socket, buzzing or crackling sounds, or fuses repeatedly blowing. 

These indicate a potentially dangerous issue that should be checked by an electrician right away.

Key Takeaways

Overloading electrical sockets is an easily avoided hazard once you understand the risks. 

It simply requires mindfulness about how many appliances are drawing power from a single socket. 

As we’ve seen, the consequences of ignoring socket limits range from melted plugs and power outages to catastrophic fires. 

The good news is that by spreading out your electrical devices, using proper extension leads wisely, and not pushing a socket beyond its capacity, you can keep your home safe. 

Regularly checking that sockets are cool to the touch and not surrounded by a tangle of adaptors is a simple habit that can prevent disasters. 

Remember that certain times of year or situations can put extra strain on your sockets. 

By respecting the limits of your plug sockets and following basic precautions, you ensure that the convenience of modern gadgets doesn’t come at the cost of your family’s safety. 

Take the time to educate everyone in your household about not overloading electrical sockets, so that safe practices are followed consistently. 

The minor inconvenience of using fewer gadgets at once or buying an extra extension lead is nothing compared to the major disruption of dealing with a house fire.

If you have any doubts or persistent electrical issues, it’s wise to consult a qualified electrician. 

It’s always better to be safe than sorry when it comes to electricity.

How to Create a Fire Emergency Evacuation Plan

A fire can break out with little warning, whether you are at home, at work, or in a public place. 

In those critical moments, having a clear fire emergency evacuation plan can save lives by telling everyone exactly how to escape quickly and safely. 

This article will explain what a fire emergency evacuation plan is, when to use it, how to create one step by step, and key tips for making it effective. 

By planning ahead and practising, you can help ensure that if a fire ever happens, you and the people around you can get to safety without panic.

What is a Fire Emergency Evacuation Plan?

what is fire emergency evacuation plan

A fire emergency evacuation plan is a written document or set of instructions that outlines how to get everyone out of a building safely if there is a fire. 

In short, it’s a guide for a quick and orderly escape during a fire emergency. 

A good plan will typically detail the designated escape routes and emergency exits, where people should assemble outside (a safe meeting point), and how to raise the alarm (for example, activating the fire alarm or shouting to alert others), as well as who will contact the fire service. 

It may also assign special roles or responsibilities – for instance, a fire marshal in a workplace might check that everyone is evacuated, or one family member might be in charge of calling the fire service. 

The purpose of a fire emergency evacuation plan is to ensure everyone knows what to do immediately if a fire breaks out, so there’s no confusion or delay when every second counts.

When is a Fire Emergency Evacuation Plan Used?

what is fire emergency evacuation plan used for

A fire emergency evacuation plan is used whenever there is a fire emergency that requires people to evacuate. 

The moment someone discovers a fire or the fire alarm sounds, everyone should follow the plan and start leaving the building to reach safety. 

This applies in all settings, workplaces, schools, shops, healthcare, and even in your own home. 

In an office or school, for example, the plan is often practised during regular fire drills so that if a real fire happens, people are prepared to act quickly and calmly. 

Essentially, any time you need to get out of a building due to a fire (or suspected fire, such as smelling smoke), you will be using your fire emergency evacuation plan. 

It’s the procedure that guides occupants to safety during those critical moments.

How to Create a Fire Emergency Evacuation Plan

Creating a fire emergency evacuation plan involves carefully thinking through how people will escape a fire safely and writing down the procedure. 

Here are the key things your plan should include and consider:

What Should Your Fire Emergency Evacuation Plan Cover?

Your fire evacuation plan should cover all the essential elements needed for a safe escape. 

Important points to include are:

Fire Detection and Alarm

Clearly state the fire detection and how people will be alerted. 

For example, note that there are smoke alarms or a fire alarm system in place and explain how to trigger the alarm (or yell “Fire!”) if someone discovers a fire. 

Also specify who will call the fire service to ensure help is on the way.

Escape Routes and Exits

Identify all the safe ways out and keep them unobstructed. 

Emergency exits should open easily. 

Provide exit signs and, if needed, emergency lighting so people can find their way even in the dark.

Assembly Point

Choose a safe spot outside (such as the far end of the car park or across the street) where everyone will meet. 

Make sure everyone knows where this assembly point is.

Training and Information

Make sure everyone in the building knows what to do. 

Employees should have training on the plan, and household members or roommates should talk through the escape steps. 

People need to be familiar with the plan ahead of time rather than trying to figure it out during an emergency.

Special Assistance

Include provisions for anyone who might need help during evacuation. 

For example, assign someone to assist individuals with limited mobility (such as using an evacuation chair for a wheelchair user), plan how to alert anyone with hearing or vision impairments, and decide who will help young children or the elderly. 

The plan should ensure no one is forgotten or left behind.

What Else Should You Consider?

Beyond the basics above, consider these additional factors to make your evacuation plan as effective as possible:

Action on Discovering a Fire

The plan should state that if anyone discovers a fire, they must immediately raise the alarm and start the evacuation. 

If the fire is very small and a person is trained to use a fire extinguisher, they can attempt to put it out only if it is safe to do so – otherwise, evacuate immediately. 

Remember that getting everyone out safely is the top priority.

Roll Call and Headcount

Your plan should include taking a headcount once everyone is at the assembly point. 

Use a staff register or headcount list to quickly see if everyone is out or if someone might still be inside. 

If anyone is unaccounted for, that information must be given to the fire service immediately when they arrive.

Liaison and Responsibilities

Assign one person to meet the firefighters when they arrive and inform them of crucial details (like if anyone is missing or where the fire is). 

Also, make sure all key roles are decided in advance – for example, who calls 911, who checks various areas, who assists people in need, and who takes the roll call. 

These clear assignments prevent confusion during an evacuation.

Fire Emergency Evacuation Plan Template

While each evacuation plan will be tailored to its location, most plans cover similar ground. 

Here is a simple outline of what a fire emergency evacuation plan document might include:

  • Introduction:  A brief description of the premises and the purpose of the plan (to ensure everyone’s safety during a fire).
  • Alarm and Emergency Contacts: How to raise the alarm and who to call in an emergency (include the fire service number and any key internal contacts).
  • Evacuation Procedures: Step-by-step instructions of what to do when the alarm sounds or a fire is discovered (for example: leave immediately by the nearest exit, do not use lifts, and close doors behind you).
  • Escape Routes and Exits: Details of primary and secondary escape routes for the building (and where maps or exit signs are posted, if applicable).
  • Assembly Point: The specific safe location outside where everyone will gather after evacuating.
  • Roles and Responsibilities: Who does what during the evacuation (for example, who calls 911, who guides people out, who takes attendance at the assembly point).
  • Assisting Vulnerable Persons: How to assist anyone who needs extra help (e.g. people with disabilities, children).
  • Post-Evacuation Actions: For example, note that a roll call will be done at the assembly point and any missing persons will be reported to the fire brigade.

How Often Should You Review Your Fire Emergency Evacuation Plan?

how often review fire emergency evacuation plan

You should review your fire emergency evacuation plan regularly to keep it up to date – at least once a year is a good guideline. 

Over time, things can change that might affect your plan. 

For example, you might renovate or rearrange the space, or new people might join (employees, residents, etc.) who have different needs. 

After any such changes, update the evacuation plan accordingly. 

It’s also wise to review the plan after any fire drill or actual emergency. 

If a drill showed confusion about a particular exit or if an alarm wasn’t heard in some area, you should fix those issues and adjust the plan. 

Regular reviews ensure that escape routes are still clear, contact information is current, and everyone remains familiar with what to do if a fire occurs.

Is a Fire Emergency Evacuation Plan a Legal Requirement?

is fire emergency evacuation plan legal requirement

Yes, in most workplaces and public buildings a fire emergency evacuation plan is a legal requirement. 

Employers and building owners are legally obliged to implement and communicate these plans. 

If you have five or more employees, you are typically expected to have the plan written down as part of your fire risk assessment duties. 

Failing to do so can lead to enforcement actions or fines because it puts people at risk. 

For private homes, a written fire evacuation plan is not required by law, but it’s strongly recommended for your safety.

Fire authorities often encourage families to discuss and practise a home escape plan because it greatly increases the chance of everyone getting out safely. 

So, while you might not be legally required to have a formal fire plan in your house, the law does mandate it for most other settings where people live or work. 

Ultimately, beyond legal compliance, having a fire emergency evacuation plan is a responsible step that protects lives.

Conclusion

You should now have an understanding of how to create a fire emergency evacuation plan

A fire emergency evacuation plan is an essential part of keeping people safe from fire. 

In an emergency, a well-prepared plan can make the difference between a quick, orderly evacuation and dangerous chaos. 

By clearly outlining how to raise the alarm, the nearest exits to use, where to assemble, and who will call for help, it removes uncertainty and panic. 

Remember that for a plan to be effective, everyone needs to know it and it should be kept up to date. 

Whether at your workplace or in your home, taking the time to create and practise a fire evacuation plan can save lives. 

Fires are unpredictable and frightening, but when everyone knows what to do and where to go, the situation becomes much more manageable. 

Being prepared is not only a legal or moral responsibility – it’s also a practical way to protect yourself and others from harm.

10 Most Common Flammable Solids

Flammable solids are materials that ignite easily and burn quickly when they come into contact with heat, sparks, or open flames. 

These materials pose a significant fire hazard because once they catch fire, the flames can spread rapidly and be difficult to control. 

From everyday items like matches and firelighters to more industrial materials like metal powders and phosphorus, these solids are present in many aspects of life. 

That’s why it is essential to understand how they behave, how to store them safely, and what to do in an emergency.

This article explores the definition of a flammable solid, introduces ten of the most common examples, and offers practical safety tips to help reduce fire risks at home and in the workplace.

What is a Flammable Solid?

A flammable solid is a material that can easily catch fire and burn rapidly when exposed to heat, sparks, friction, or an open flame. 

These substances are classified as Class 4 hazardous materials under international transport and safety guidelines because of their high risk of ignition and fire spread.

Flammable solids can be found in many forms, powders, granules, sheets, or even everyday products like matches and firelighters. 

Some are naturally combustible, while others become dangerous when exposed to air, moisture, or certain chemicals. 

They are often used in industrial processes, laboratories, manufacturing, and even in household products, making them more common than many people realise.

The main danger with flammable solids lies in how quickly they can ignite and how fiercely they can burn. 

For example, powdered metals like aluminium or magnesium can burn extremely fast and even explode when airborne. 

Others, like phosphorus or alkali metals, can self-ignite when exposed to air or water.

Flammable solids are grouped into three categories for safety purposes:

  • Division 4.1: Flammable solids (e.g. matches, sulphur)
  • Division 4.2: Substances liable to spontaneous combustion (e.g. phosphorus)
  • Division 4.3: Substances that emit flammable gas when in contact with water (e.g. sodium)

Because of their fire risk, these materials must be stored, handled, and transported with extreme care. 

Understanding what flammable solids are, and how they behave, is key to preventing dangerous fires and accidents.

10 Most Common Flammable Solids

Flammable solids are materials that catch fire easily and burn rapidly. 

They are found in homes, workplaces, and industries, and can become extremely dangerous if handled carelessly. 

Below are ten of the most common flammable solids, including how they behave and why they require careful attention.

Alkali Metals

sodium alkali metal
Source: Wikipedia

Alkali metals include elements such as lithium, sodium, potassium, and rubidium. 

These metals are highly reactive and are known to ignite spontaneously in air or explode on contact with water.

When exposed to moisture, alkali metals produce hydrogen gas and heat, which can cause immediate ignition. 

For example, a small piece of sodium dropped into water will fizz, spark, and potentially explode. 

These reactions are not just spectacular, they are highly dangerous.

Alkali metals are used in batteries, research labs, and chemical manufacturing. 

Because of their reactivity, they are stored under oil or in sealed containers to prevent exposure to air or water.

Celluloid

celluloid film
Source: Wikipedia

Celluloid is one of the earliest types of plastic, made by combining nitrocellulose with camphor. 

It was once used widely in film reels, combs, toys, and even dentures. 

However, celluloid is highly flammable and can ignite from just a small amount of heat or friction.

When it burns, it produces a fast, intense flame that is difficult to control. 

Early cinema fires were often caused by celluloid film catching fire under the heat of a projector bulb.

Today, celluloid has been largely replaced by safer materials, but it still appears in some vintage items. 

It should always be kept away from heat and stored in well-ventilated areas.

Coal

coal

Coal is a black or brownish-black rock made of carbon-rich material. 

It has been used as a fuel source for centuries, particularly in power stations, homes, and industrial processes.

Although solid coal is relatively stable, coal dust is extremely flammable. 

Fine coal particles suspended in air can create explosive mixtures, especially in enclosed spaces like mines or silos.

Fires involving coal are hard to extinguish once started. 

They can smoulder deep within coal piles for days or weeks. 

Good ventilation and dust control are essential in environments where coal is stored or used.

Firelighters

firelighter
Source: Wikipedia

Firelighters are small blocks or cubes made from flammable substances such as paraffin wax, kerosene, or compressed wood and oil. 

They are designed to catch fire easily and help light barbecues, wood burners, or campfires.

While firelighters are very useful, they must be handled with care. 

Storing them near open flames or in high temperatures can lead to accidental fires. 

Some types release flammable vapours that can ignite suddenly.

Always store firelighters in a cool, dry place and use them as instructed. 

Keep them out of reach of children and never use them to revive a dying fire, they can flash back dangerously.

Matches

burning match
Source: Wikipedia

Matches are perhaps the most familiar flammable solid. 

They consist of a small wooden or cardboard stick tipped with chemicals that ignite when struck.

The match head typically contains potassium chlorate, sulphur, and other substances. 

When struck against the matchbox surface, friction produces enough heat to ignite the chemicals and start a flame.

Because they are so easy to light, matches are considered hazardous goods. 

They should be kept in their original packaging, stored away from heat, and handled responsibly. 

Used matches should be fully extinguished and disposed of safely.

Metal Powders

metal powder

Fine metal powders such as aluminium, magnesium, titanium, and zirconium are highly flammable, especially when dispersed in air.

These powders are used in fireworks, pyrotechnics, welding, and metal finishing. 

When airborne, they can form explosive mixtures that ignite with a single spark. 

Magnesium powder, for example, burns at extremely high temperatures and can cause severe burns or fires.

To reduce the risk of explosions, metal powders must be stored in tightly sealed containers in non-sparking environments. 

Dust should be cleaned using specialised vacuum systems, and equipment should be grounded to prevent static electricity.

Phosphorus

black phosphorus
Source: Wikipedia

Phosphorus exists in several forms, but white phosphorus is the most flammable. 

It ignites spontaneously in air and burns with a bright, white flame. 

Because of this, white phosphorus is stored underwater or in sealed containers to prevent exposure to oxygen.

Phosphorus is used in military applications, chemical manufacturing, and fertilisers. 

It’s also found in small amounts in some matches and fireworks.

Even brief contact with white phosphorus can cause serious burns. 

It also releases toxic fumes when it burns, making it dangerous to inhale. 

Red phosphorus is more stable but can still ignite under friction or heat.

Seed Cake

seed cake
Source: Wikipedia

Seed cake is the solid by-product left after oil is extracted from oil-rich seeds, such as linseed, sunflower, or cottonseed. 

Although it may look harmless, seed cake can catch fire spontaneously during storage.

Residual oils within the cake can oxidise over time, generating heat. 

If the heat isn’t allowed to escape, due to poor ventilation or compact storage, it can build up until the seed cake catches fire on its own.

Seed cake is often used as animal feed or fertiliser. 

It must be stored in cool, dry conditions and checked regularly for signs of heating or smoke. 

Fires in seed cake storage can spread quickly once started.

Sodium Batteries

sodium batteries
Source: Wikipedia

Sodium batteries are known for high energy storage but also come with fire risks. 

They contain sodium metal, which reacts violently with water and moisture.

If the battery casing is damaged or the battery overheats, the sodium can ignite, causing intense fires. 

In worst cases, the battery may explode or leak hot, flammable materials.

Sodium batteries are used in large-scale energy storage and some newer electric vehicle concepts. 

Because of their high energy and fire potential, they require robust safety systems, temperature controls, and fire-resistant housing.

Sulphur

sulphur
Source: Wikipedia

Sulphur is a yellow, non-metallic element found in nature and used in many industrial processes, including the production of sulphuric acid, fertilisers, and matches.

When heated, sulphur melts into a reddish liquid and eventually ignites, burning with a blue flame and producing sulphur dioxide gas. 

This gas is toxic and irritating to the eyes, nose, and throat.

Sulphur fires can be difficult to put out and produce large amounts of smoke. 

In powder form, it poses an even greater fire risk, as it can ignite easily and burn rapidly.

To handle sulphur safely, store it in well-ventilated areas away from heat or open flames, and avoid creating dust clouds when moving or processing the material.

How to Protect Yourself from Common Flammable Solids

Flammable solids can pose serious fire hazards if not handled with care. 

Whether you’re working with these materials in an industrial setting or storing them at home, following simple safety steps can reduce the risk of accidents.

Store Properly

Keep flammable solids in cool, dry, and well-ventilated areas. 

Avoid places with direct sunlight, heat sources, or open flames. 

Always store materials in containers specifically designed for hazardous goods, and ensure lids are sealed tightly to prevent spills and contamination.

Use the Right Equipment

When handling flammable solids, wear appropriate personal protective equipment (PPE)

This includes gloves, eye protection, flame-resistant clothing, and sometimes respirators if there is dust or fumes. 

Using the right tools, such as non-sparking scoops or containers, can also help prevent accidental ignition.

Separate Incompatible Materials

Some flammable solids react dangerously with other substances, including water or certain chemicals. 

Keep incompatible materials stored separately and clearly label all containers. 

Consult safety data sheets (SDS) for guidance on proper segregation.

Prevent Dust Buildup

Fine powders like metal dust or coal can ignite easily when dispersed in air. 

Regularly clean work areas to prevent dust accumulation, and avoid sweeping, which can stir up particles – use a vacuum with a HEPA filter instead.

Train and Educate

Make sure everyone handling these materials receives proper training

Staff should know how to store, handle, and dispose of flammable solids safely. 

Emergency procedures should be clearly displayed, and fire extinguishers or other firefighting tools should be easily accessible.

Conclusion

You should now have more of an understanding of common flammable solids. 

Flammable solids present serious fire risks, especially when they are mishandled, stored incorrectly, or exposed to heat, sparks, or open flames. 

Each flammable solid has unique properties, ignition points, and hazards. 

Some, like celluloid or metal powders, can ignite with friction or static discharge. 

Others, such as seed cake or coal, may combust spontaneously under the right conditions. 

Being aware of these differences helps individuals and businesses store and handle these substances more responsibly.

By respecting the dangers and taking the right precautions, we can use these materials safely and avoid potentially life-threatening incidents.

What is a Fourth Degree Burn?

Burn injuries are among the most painful and complex wounds a person can experience. 

They are classified by degrees of severity, from minor first degree burns that affect only the outer layer of the skin, to life-threatening fourth degree burns that damage deeper tissues beneath the skin. 

While most people are familiar with first, second, and third degree burns, fourth degree burns are far less common and far more serious.

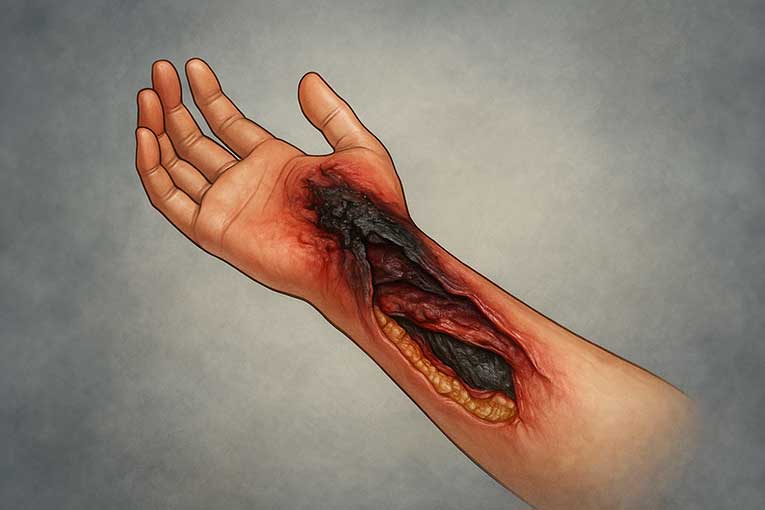
A fourth degree burn goes beyond the skin’s surface, destroying the underlying fat, muscle, and even bone. 

Understanding the nature of a fourth degree burn is vital, not just for medical professionals, but for the general public as well. 

Quick action can be the difference between life and death. 

In this article, we will explore what exactly a fourth degree burn is, how it differs from other types of burns, what causes it, how it’s treated, and what recovery looks like.

What is a Fourth Degree Burn?

what is fourth degree burn

A fourth degree burn is the most severe type of burn injury. 

It goes beyond damaging just the skin and affects deeper layers of tissue, including fat, muscles, tendons, and even bone. 

At this level, the burn completely destroys both the outer (epidermis) and inner (dermis) layers of skin, leaving the affected area blackened, charred, or dry and white in appearance.

Because fourth degree burns damage nerves, the injured area may not be painful at first. This absence of pain does not mean the injury is minor, it is often a sign that the nerve endings have been destroyed. 

These burns are usually caused by prolonged exposure to intense heat, open flames, electricity, or strong chemicals.

Due to the depth of tissue damage, fourth degree burns can lead to serious complications, such as infection, fluid loss, shock, and organ failure. 

Immediate medical treatment is essential. 

These burns often require surgery, including skin grafts or even amputation in severe cases.

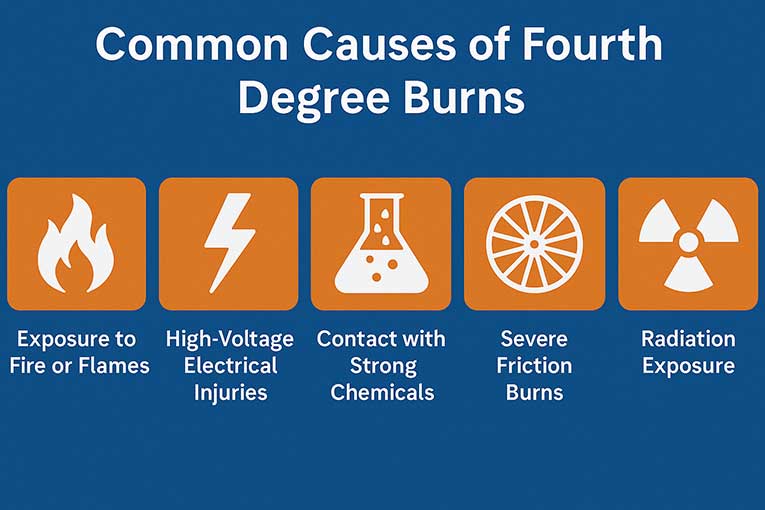
What Are The Most Common Causes of a Fourth Degree Burn?

fourth degree burn causes

Fourth degree burns are serious injuries that occur when the body is exposed to extreme heat or harmful substances for a prolonged period. 

These burns go beyond the skin and affect deeper tissues, such as fat, muscle, and bone. Below are the most common causes.

Prolonged Exposure to Fire or Flames

One of the leading causes of fourth degree burns is prolonged contact with open flames. 

This often occurs in house fires, vehicle accidents, or industrial incidents where escape is delayed. 

Clothing can catch fire, holding heat against the skin and allowing the burn to penetrate deep into the body.

High-Voltage Electrical Injuries

Electrical burns, especially from high-voltage sources, can cause fourth degree burns. 

Electricity generates intense heat as it travels through the body, burning internal tissues even if the skin appears only mildly affected. 

This type of injury is common in construction sites, industrial settings, and electrical accidents.

Contact with Strong Chemicals

Exposure to strong acids or alkalis, such as industrial cleaning agents or corrosive substances, can lead to deep tissue burns. 

Chemical burns can continue to damage the skin and tissue long after the initial contact if not washed off quickly and thoroughly.

Severe Friction Burns

Friction burns occur when the skin rubs against a rough surface at high speed, such as in motorcycle accidents or being dragged across a hard surface. 

If the contact is strong and long enough, it can lead to fourth degree burns that extend into muscle and bone.

Radiation Exposure

Though less common, extremely high doses of radiation, such as in industrial accidents or overexposure during radiation therapy, can damage tissue layers beyond the skin, resulting in deep burns.

How Is a Fourth Degree Burn Different to Other Types of Burns?

classifications of burns
Source: Wikipedia

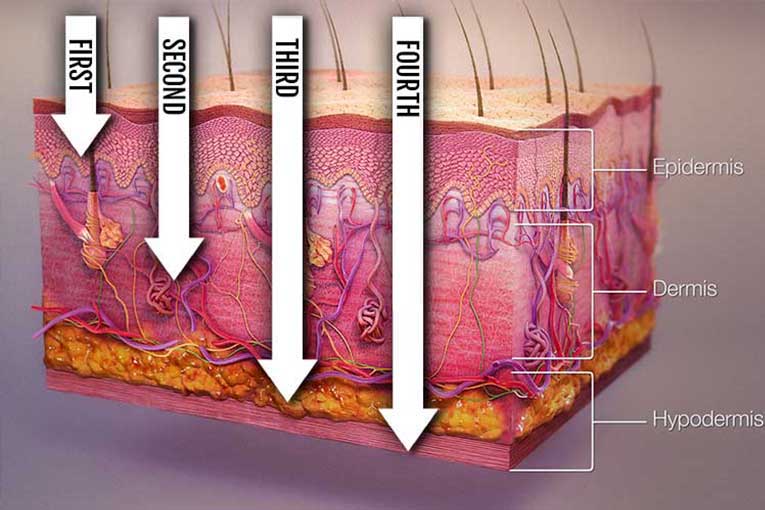
There are different classifications of burns, based on their severity. 

Fourth degree burns are the most severe, causing destruction far beyond what is seen in first, second, or even third degree burns.

Here’s how fourth degree burns compare to other burn types:

First  Degree Burns

First degree burns affect only the outermost layer of skin, known as the epidermis.

The area becomes red, sore, and dry, with mild swelling.

Pain is usually present, but the burn typically heals within a week without scarring.

Second Degree Burns

Second degree burns reach into the second skin layer, the dermis.

They cause blisters, intense pain, and swelling.

Healing may take several weeks, and scarring is possible, depending on the depth.

Third Degree Burns

Third degree burns destroy both the epidermis and dermis.

The skin may appear white, blackened, or leathery.

Because nerve endings are damaged, the area may feel numb.

These burns often require skin grafts and leave permanent scars.

Fourth Degree Burns

Fourth degree burns extend through all layers of skin and into the underlying fat, muscle, and bone.

These burns are usually painless at the site due to complete nerve destruction.

The affected area may look charred, blackened, or dry and white.

They require immediate emergency treatment, often involve surgery or amputation, and result in long-term disability, permanent scarring, and significant functional loss.

How is a Fourth Degree Burn Treated?

fourth degree burn treatments

Treating a fourth degree burn is a complex and urgent medical task. 

Because these burns affect all layers of skin and deeper tissues such as fat, muscle, and even bone, they require immediate and specialist care. 

Treatment usually begins in an emergency department or burn unit.

The first step is to stabilise the patient. 

Doctors will assess the extent of the burn, manage pain, and prevent or treat shock. 

Intravenous fluids are given to prevent dehydration and maintain blood pressure. 

Antibiotics may also be used to prevent infection, which is a major risk with deep burns.

Next, dead or damaged tissue must be removed through a process called debridement. 

This helps the wound heal and reduces the chance of infection. 

Skin grafts are often needed to replace damaged tissue. 

In very severe cases, amputation of affected limbs may be necessary.

Ongoing treatment may include reconstructive surgery, physical therapy, and occupational therapy to restore movement and strength. 

Due to the trauma of the injury, psychological support is also a vital part of recovery.

Patients with fourth degree burns typically require long-term hospital care, including time in an intensive care or specialist burn unit. 

Early and aggressive treatment at a healthcare facility is essential for improving survival and long-term outcomes. 

Without it, fourth degree burns can lead to life-threatening complications and permanent disability.

How Long Does a Fourth Degree Burn Take to Heal?

Healing from a fourth degree burn is a long and complex process. 

These burns destroy all layers of the skin and reach into deeper tissues such as fat, muscle, and even bone. 

Because of this severe damage, the body cannot heal on its own without major medical intervention.

The initial hospital stay can last several weeks to months, depending on the size and location of the burn and whether complications arise. 

During this time, the patient may undergo multiple surgeries, such as debridement (removal of dead tissue) and skin grafts. 

In some cases, amputations or reconstructive surgery may also be required.

Even after leaving the hospital, long-term recovery continues. 

Physical therapy is often needed to regain movement, particularly if joints or muscles are affected. 

Patients may also need occupational therapy, psychological support, and regular check-ups to monitor healing.

Full recovery can take many months or even years. 

The exact timeline varies depending on the person’s age, overall health, and how quickly they respond to treatment. 

Some people may face lifelong challenges, including scarring, reduced mobility, or chronic pain.

Does a Fourth Degree Burn Scar?

Yes, a fourth degree burn almost always leaves significant scarring. 

Because this type of burn destroys all layers of the skin and extends into underlying tissues such as fat, muscle, and bone, the damage is permanent and severe. 

As the skin cannot heal naturally in these cases, scarring is an unavoidable part of the recovery process.

The scars from fourth degree burns are often deep, large, and discoloured. 

They may appear raised, tight, or shiny, and can be either lighter or darker than the surrounding skin. 

Common types of scarring include hypertrophic scars, which are thick and red but remain within the wound area, and keloid scars, which grow beyond the boundaries of the original injury.

In addition to scarring, many patients develop contractures, where the skin and underlying tissues tighten and restrict movement, especially when burns are near joints. 

This can affect mobility and lead to long-term physical difficulties.

To manage scarring, patients may undergo treatments such as pressure garments, silicone gel sheets, steroid injections, and in some cases, reconstructive surgery. 

While these methods can reduce the appearance and discomfort of scars, they cannot remove them entirely.

Emotional and psychological support is also important, as scarring can impact confidence and mental wellbeing.

Conclusion

You should now have an understanding of what a fourth degree burn is. 

Fourth degree burns are among the most devastating and life-threatening injuries a person can suffer. 

This level of damage can result in permanent disability, disfigurement, and, in the most severe cases, death. 

Recovery is rarely straightforward and often requires months or even years of intensive medical care, surgeries, and physical rehabilitation.

Immediate medical intervention is essential. 

The faster a patient receives professional care, the better the chances of stabilising their condition, preventing infections, and beginning the long road to recovery. 

Fire safety education, use of protective gear, and better awareness of hazards can all play a role in prevention.

What is a First Degree Burn?

Burns are a common injury, and they can occur in a variety of settings, whether at home, at work, or during outdoor activities. 

One of the most common types of burns is a first-degree burn. 

But what does a first degree burn mean?

While these burns are typically not severe, they can still cause discomfort and require attention to avoid complications. 

Understanding what a first-degree burn is, how it differs from other types of burns, and how to treat it properly can help prevent further damage and ensure a speedy recovery. 

This article will explore what a first-degree burn is, its common causes, how it differs from other burns, how to treat it, and how long it takes to heal.

What is a First Degree Burn?

what is first degree burn

A first-degree burn is the mildest type of burn injury. 

It affects only the outer layer of the skin, known as the epidermis

This type of burn is usually caused by mild heat, such as a sunburn or a brief exposure to a hot object, and typically does not lead to permanent damage.

Characteristics of a First Degree Burn

The main characteristics of a first-degree burn include:

  • Redness: The skin may appear red or pink, especially around the affected area.
  • Pain: A first-degree burn may be painful, but the discomfort is usually mild to moderate.
  • Swelling: The affected skin may become slightly swollen, though it does not typically result in blistering.
  • Dry Skin: The skin may feel dry, and peeling can occur as the burn heals.

Since first-degree burns only affect the epidermis, they are generally considered to be minor burns that do not require medical attention unless they cover a large area or cause extreme discomfort.

What Are The Most Common Causes of a First Degree Burn?

first degree burn causes

First-degree burns can be caused by a variety of everyday situations. 

They are typically the result of exposure to heat or sun, though other factors can also play a role. 

Some of the most common causes include:

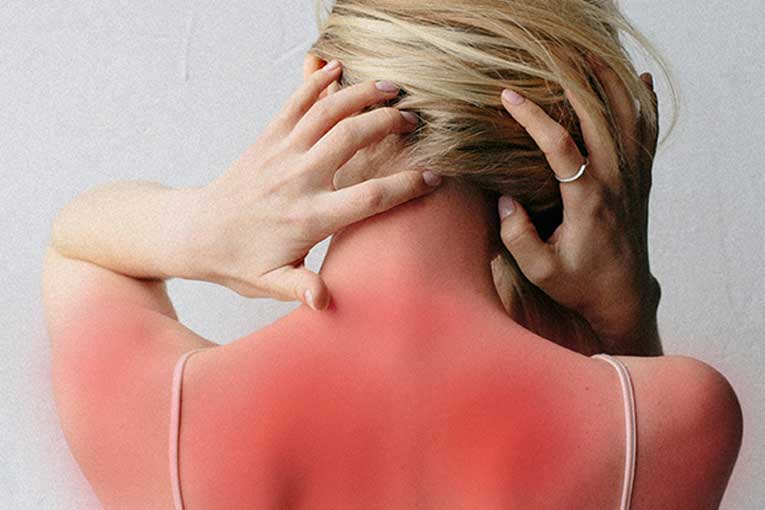
Sunburn

One of the most common causes of a first-degree burn is sunburn, which occurs when the skin is overexposed to ultraviolet (UV) radiation from the sun. 

Sunburns often cause redness and discomfort, and the skin may peel after a few days as it heals.

Hot Objects

Contact with hot objects, such as a stovetop, iron, or heated metal, can cause a first-degree burn. 

The skin may redden and feel sore, but there is typically no blistering or significant damage to the underlying tissue.

Scalds from Hot Liquids

Spilling hot liquids, such as boiling water, soup, or coffee, can also lead to a first-degree burn. 

The severity of the burn can depend on how long the skin is exposed to the hot liquid, but first-degree burns from scalds are usually not severe.

Mild Electrical Burns

Electrical burns from low-voltage sources, like a faulty electrical appliance, can cause first-degree burns if the skin comes into brief contact with the electrical source. 

These burns usually cause redness and mild pain.

Friction Burns

Friction burns can occur when the skin is rubbed against a rough surface, such as when a person falls onto the pavement. 

These burns typically affect only the epidermis and are considered first-degree burns if the damage is limited to this outer layer.

How Is a First Degree Burn Different to Other Types of Burns?

first degree burn different to other types of burn
Source: Wikipedia

There are four main burn classifications based on their severity: first-degree burns, second-degree burns, third-degree burns, and fourth-degree burns. 

Each type of burn differs in how deep it penetrates the skin and how severe the symptoms are.

First-Degree Burns

As previously mentioned, first-degree burns affect only the epidermis, the outermost layer of the skin. 

These burns are usually mild and can be treated at home with basic first aid. 

Symptoms include redness, mild swelling, and pain, but there is no blistering.

Second-Degree Burns

Second-degree burns affect both the epidermis and the underlying layer of skin, known as the dermis. 

These burns are more severe than first-degree burns and typically cause more intense pain, swelling, and redness. 

Blisters may form, and the skin may appear shiny or wet. 

Second-degree burns often require medical attention and may take longer to heal.

Third-Degree Burns

Third-degree burns are the most severe type of burn. 

They penetrate through the epidermis and dermis and can affect the underlying tissue, including muscles and bones. 

These burns may appear white, charred, or leathery and are often painless due to nerve damage. 

Third-degree burns are a medical emergency and require immediate attention. 

They can cause permanent damage to the skin and may require grafting or other surgical treatments.

Fourth-Degree Burns

Fourth-degree burns are the most severe and deepest type of burn. 

These burns extend beyond the skin into the underlying tissues, including fat, muscles, tendons, and bones. 

Fourth-degree burns are often caused by extreme heat or prolonged exposure to a heat source, such as a fire or electrical burns. 

The skin may appear blackened, charred, or leathery, and the area may be completely numb due to nerve damage. 

Fourth-degree burns are a medical emergency, and immediate treatment is necessary. 

These burns can result in permanent tissue damage, loss of function in the affected area, and, in extreme cases, can be life-threatening. 

Treatment often involves surgical interventions like debridement, skin grafting, or amputation.

How is a First Degree Burn Treated?

first degree burn treatments

First-degree burns are typically easy to treat at home, as they do not cause significant damage to the skin. 

Here are some steps to follow for effective first-degree burn treatment:

Cool the Burn

The first step in treating a first-degree burn is to cool the skin. 

You should immediately run cool (not cold) water over the affected area for about 10-15 minutes. 

This will help to reduce the pain and prevent the burn from getting worse. 

If running water is not available, you can also apply a cool, damp cloth to the burn.

Avoid Ice

While it may seem tempting to use ice to cool the burn, this can actually cause further damage to the skin. 

Avoid placing ice directly on the burn or using very cold water, as it can freeze the skin and make the situation worse.

Apply a Moisturiser or Aloe Vera Gel

After cooling the burn, you can apply a moisturiser or aloe vera gel to soothe the skin. 

Aloe vera is known for its cooling properties and can help to reduce redness and swelling. 

Be sure to use a product that is free of alcohol or other harsh ingredients, as these can irritate the skin further.

Take Over-the-Counter Pain Relievers

If the burn is painful, over-the-counter pain relievers such as ibuprofen or paracetamol can help to reduce discomfort. 

Always follow the recommended dosage instructions on the packaging.

Protect the Burn from Further Damage

If the burn is located on an area that may be exposed to friction or further irritation (such as the hands or feet), you may want to cover the burn with a clean, non-stick bandage. 

Make sure the bandage is not too tight, as this could restrict circulation.

Avoid Popping Blisters

Although first-degree burns typically do not cause blisters, if they do form, it’s important not to pop them. 

Blisters act as a natural barrier against infection, and breaking them can lead to further complications.

How Long Does a First Degree Burn Take to Heal?

The healing time for a first-degree burn is relatively short. 

Most first-degree burns heal within 7 to 10 days without leaving permanent scars. 

However, the healing time can vary depending on the severity of the burn, the size of the affected area, and how well the burn is treated.

Factors Affecting Healing Time

  • Size of the Burn: Larger burns may take slightly longer to heal, although they are still considered first-degree burns.
  • Location of the Burn: Burns on more sensitive areas of the body, such as the face or hands, may take longer to heal.
  • Proper Treatment: Burns that are treated properly and promptly usually heal more quickly than those that are not cared for correctly.

During the healing process, the skin may peel as it regenerates, and the redness will gradually fade. 

Once healed, the skin will usually return to its normal colour, but it may feel dry or slightly sensitive for a short time.

Does a First Degree Burn Scar?

First-degree burns generally do not result in scarring, especially if they are properly treated. 

Since these burns only affect the outer layer of the skin, the body is typically able to heal without permanent damage. 

However, in some cases, if the burn is extensive or improperly treated, there may be a slight chance of scarring.

How to Minimise Scarring

To minimise the risk of scarring, it is essential to:

  • Keep the burn clean and avoid infection.
  • Use moisturising lotions to keep the skin hydrated during the healing process.
  • Avoid picking at the burn or peeling off the skin prematurely.
  • Protect the healing skin from excessive sun exposure, as sunburn can cause pigmentation changes and increase the risk of scarring.

Conclusion

You should now have an understanding of exactly what a first degree burn is. 

A first-degree burn is a common and usually mild type of burn that affects only the outer layer of the skin. 

These burns are generally caused by mild heat or sun exposure and can be easily treated at home. 

With proper care, first-degree burns typically heal within a week to ten days and rarely leave permanent scarring. 

By understanding the symptoms, causes, and treatment of first-degree burns, individuals can effectively manage this type of injury and avoid complications. 

If a burn appears more severe or shows signs of infection, it’s important to seek medical attention promptly.

What is a Third Degree Burn?

A third-degree burn is one of the most severe type of burn. 

But exactly what is a third degree burn?

It affects all layers of the skin, and can cause serious damage to tissues beneath. 

These burns require immediate medical attention, as they can lead to lasting damage and complications. 

In this article, we will discuss what a third-degree burn is, its causes, treatments, healing time, and potential scarring.

What is a Third Degree Burn?

A third-degree burn is the deepest type of burn injury. 

It affects the epidermis, dermis, and sometimes the subcutaneous tissue (fat and muscle). 

This kind of burn causes the skin to become charred, white, or leathery. 

The skin may also look dry and may not bleed. 

Because the damage extends to nerve endings, a third-degree burn might not be as painful initially as a first- or second-degree burn. 

However, it is extremely serious.

In third-degree burns, nerve endings are often destroyed, leading to numbness in the area. 

This is why the burn may not cause much immediate pain. 

These burns can also affect underlying tissues, such as muscles, tendons, and bones.

They may require significant treatment, such as skin grafts or even surgery, depending on the severity.

What Are The Most Common Causes of a Third Degree Burn?

causes of third degree burn

Third-degree burns are usually caused by extreme heat or chemicals. 

Below are some of the most common causes:

Flames

One of the most common causes of third-degree burns is fire. 

Whether from a house fire, an explosion, or being caught in flames, direct exposure to fire can quickly cause severe burns. 

Clothing that catches fire can also lead to third-degree burns.

Hot Liquids or Steam

Hot liquids, such as boiling water or oil, can cause third-degree burns if they are spilled or splashed onto the skin. 

Prolonged contact with hot steam can also cause serious burns, especially in areas like the face and chest.

Electrical Burns

Electricity can cause severe burns when it passes through the body. 

These burns can cause deep tissue damage and even cardiac arrest. 

Electrical burns usually occur when someone comes into direct contact with a live electrical source.

Chemical Burns

Certain chemicals can cause third-degree burns if they come into contact with the skin. 

Acids and alkalis, for example, can cause serious burns. 

Chemical burns may occur in industrial settings or due to household cleaners.

Radiation Burns

Exposure to radiation, such as from sunburns or radiation therapy, can also lead to third-degree burns. 

Sunburns from prolonged sun exposure, especially in sensitive areas, can reach this level of severity in extreme cases.

How Is a Third Degree Burn Different to Other Types of Burns?

how third degree burn different
Source: Wikipedia

There are different classifications of burns, based on their severity. 

Third-degree burns are the most serious, affecting deeper layers of skin and tissue. 

Here’s how they differ from first- and second-degree burns:

First-Degree Burns

A first-degree burn affects only the outer layer of the skin, the epidermis

The skin becomes red, sore, and may peel after a few days. 

These burns are mild, and usually heal within a week. 

They rarely cause scarring.

Second-Degree Burns

A second-degree burn affects both the epidermis and the dermis

These burns cause blisters, pain, and swelling. 

They can lead to deeper damage and may require weeks to heal. 

Second-degree burns often leave scarring but are not as severe as third-degree burns.

Third-Degree Burns

A third-degree burn is the most severe. 

It damages all layers of the skin and may affect muscles, tendons, and bones. 

The skin may appear white, charred, or leathery, and it may feel numb due to nerve damage. 

Third-degree burns require immediate medical treatment and can result in long-term scarring, disability, and loss of function.

How is a Third Degree Burn Treated?

A third-degree burn requires immediate medical attention.

It is important to follow the right steps to prevent complications and promote healing. 

Here’s how third-degree burns are typically treated:

Call for Help

If you or someone else suffers a third-degree burn, call emergency services immediately. 

This is a life-threatening situation, and professional medical help is essential.

Stop the Burning Process

If the burn is caused by fire, stop, drop, and roll to extinguish the flames. 

If the burn is caused by chemicals, remove any contaminated clothing and rinse the area with water (unless directed otherwise by medical personnel). 

For electrical burns, ensure the person is no longer in contact with the electrical source before offering help.

Cover the Burn

While waiting for medical help, cover the burn with a sterile, non-stick dressing or a clean cloth. 

This helps protect the area from infection and reduces pain. 

Avoid using ice or applying any ointments, as they can worsen the damage.

Monitor for Shock

A person with a third-degree burn may go into shock. 

Signs of shock include rapid breathing, weak pulse, and pale or clammy skin. 

If this happens, lay the person flat, raise their feet, and keep them warm until help arrives.

Hospital Treatment

In the hospital, doctors will assess the burn and may perform treatments like fluid resuscitation (to replace lost fluids), debridement (removal of dead tissue), and skin grafts (to cover large areas of damage). 

Pain management is a priority.

How Long Does a Third Degree Burn Take to Heal?

how long third degree burn heal

Healing time for a third-degree burn depends on its severity and the treatment required. 

These burns are serious, and full recovery may take weeks, months, or even longer.

Initial Healing

The immediate response to a third-degree burn is to stabilise the person and prevent infection. 

The skin and underlying tissues will begin to heal, but the process can take a long time. 

Skin grafts may be needed to replace the damaged skin, especially if the burn is large.

Recovery Time

For most third-degree burns, healing can take weeks to months. 

Smaller burns might heal faster, but larger burns can require ongoing treatment and rehabilitation. 

A person may need physical therapy to regain strength and mobility.

Long-Term Care

Even after the burn heals, the person may need continued care to address complications like infection, scarring, or loss of function. 

Ongoing medical treatment may be necessary to improve the appearance of scars and restore skin function.

Does a Third Degree Burn Scar?

Yes, third-degree burns almost always cause scarring. 

The deeper the burn, the more likely it is to cause permanent scarring. 

The skin may form thick, keloid scars, or it may be contracted, causing the skin to tighten.

Scar Treatment

While third-degree burn scars can be severe, treatment can help minimise their appearance. Scar treatment options include:

  • Pressure garments to help flatten scars
  • Surgical revision to improve the appearance
  • Laser therapy for scar reduction
  • Physical therapy to prevent skin tightening

It’s important to follow medical advice to improve scar healing and prevent long-term complications.

Conclusion

You should now have more of an understanding of exactly what is a third degree burn. 

A third-degree burn is a serious injury that can cause extensive damage to the skin and underlying tissues. 

Immediate medical care is essential to prevent complications, promote healing, and reduce scarring. 

With proper treatment and ongoing care, people can recover from third-degree burns, though healing time is long, and scarring is inevitable. 

If you or someone you know suffers a third-degree burn, seek medical help immediately.

What is a Second Degree Burn?

A second-degree burn can cause serious damage to the skin. 

While not as severe as third-degree burns, they still require attention and care. 

Second-degree burns affect deeper layers of the skin, causing pain, swelling, and blistering. 

Understanding what a second-degree burn is and how to treat it is important for healing and preventing further complications. 

In this article, we’ll explain the nature of second-degree burns, their causes, treatments, healing times, and more.

What is a Second Degree Burn?

A second-degree burn affects both the outer layer of skin (epidermis) and the deeper layer (dermis). 

These burns are more serious than first-degree burns, which affect only the outer skin. 

Second-degree burns typically cause blisters, severe pain, redness, and swelling. 

In some cases, the skin may appear wet or shiny due to the loss of fluids from the affected area.

Second-degree burns are classified into two categories based on the depth of the injury:

Superficial Partial-thickness Burns

These affect the top layer of the dermis and may cause the skin to blister and appear red and swollen. 

Deep Partial-thickness Burns: 

These burn deeper into the dermis, causing more severe damage. 

The skin may appear pale or blotchy and take longer to heal.

What Are The Most Common Causes of a Second Degree Burn?

second degree burn causes

Second-degree burns can occur due to several common factors. 

The most frequent causes include:

Hot Liquids

Scalding from hot liquids such as boiling water, coffee, or tea is one of the leading causes of second-degree burns. 

Spilling or splashing these liquids onto the skin can cause severe burns and blistering.

Hot Objects

Contact with hot objects, such as irons, stoves, or ovens, can lead to second-degree burns. 

Skin can burn quickly if it comes into direct contact with these surfaces for even a short period.

Sunburn

Excessive exposure to the sun’s ultraviolet (UV) rays can cause second-degree burns. 

Sunburns from prolonged sun exposure can cause the skin to blister and become red, painful, and swollen.

Electrical Burns

Electrical burns occur when an electrical current passes through the body, damaging the skin. 

These burns can be deep and severe, especially when the current is high.

Chemical Burns

Certain chemicals, such as acids or alkalis, can cause second-degree burns if they come into contact with the skin. 

These burns can be dangerous and require immediate medical attention.

Fire or Flames

Second-degree burns can result from direct exposure to flames, often during accidents, fires, or cooking mishaps, such as grease fires

The skin may burn if exposed to high heat for too long.

How Is a Second Degree Burn Different to Other Types of Burns?

how second degree burn different
Source: Wikipedia

There are different classifications of burns, based on how severe they are.

A second-degree burn is more severe than a first-degree burn but not as serious as a third-degree burn.

First-Degree Burns

A first-degree burn affects only the outer layer of the skin (epidermis). 

It causes redness, mild swelling, and pain. 

Sunburn is a common example of a first-degree burn.

Second-Degree Burns

Second-degree burns affect both the epidermis and the dermis (the deeper layer of skin). 

They cause blisters, severe pain, redness, and swelling. 

These burns often result from contact with hot liquids, flames, or chemicals. 

Third-Degree Burns

A third-degree burn is the most severe. 

It affects all layers of the skin, and can also damage underlying tissues, nerves, and muscles. 

The skin may appear white, charred, or leathery. 

Third-degree burns often do not cause pain initially due to nerve damage. 

How is a Second Degree Burn Treated?

Treating a second-degree burn quickly and properly is crucial for healing and preventing complications. 

The main focus is to reduce pain, prevent infection, and promote healing.

Cool the Burn

Immediately after the injury, cool the burn by running cool (not cold) water over the affected area for 10 to 20 minutes. 

This helps to stop the burn from getting worse and reduces pain. 

If running water is not available, apply a cool, wet compress. 

Avoid using ice, as it can cause further damage to the skin.

Clean the Burn

Gently clean the burn area with mild soap and cool water to remove any dirt or debris. 

Do not scrub the burn, as this could damage the skin further. 

Pat the area dry with a clean towel, being careful not to break any blisters that may have formed.

Apply an Antibiotic Ointment

Once the area is clean, apply an over-the-counter antibiotic ointment such as neosporin to help prevent infection. 

Cover the burn with a sterile, non-stick dressing to protect it from dirt and bacteria.

Pain Relief

Take over-the-counter pain relief medication like paracetamol or ibuprofen to manage the pain and reduce swelling. 

Follow the instructions on the packaging for correct dosing.

Avoid Popping Blisters

Blisters that form during healing protect the underlying skin. 

Do not pop or burst them, as this can lead to infection. 

If a blister breaks on its own, clean the area and apply a sterile dressing.

Seek Medical Help

If the burn is large, covers the face, hands, or genitals, or if it seems infected, seek medical help immediately. 

For deep second-degree burns, professional care may be needed.

How Long Does a Second Degree Burn Take to Heal?

how long second degree burn heal

The healing time for a second-degree burn depends on the depth of the burn, the location, and the treatment. 

Superficial Partial-thickness Burns

These usually heal within 2-3 weeks without scarring, although some discolouration may remain for a while.

Deep Partial-thickness Burns

These burns take longer to heal, often requiring 3-4 weeks or more. 

Scarring may occur, and the skin may need additional care during healing.

It is important to continue monitoring the burn during the healing process. 

If there are any signs of infection or complications, seek medical help immediately.

Does a Second Degree Burn Scar?

Second-degree burns can scar, especially if they are deep or not treated properly. 

Scarring is more likely if:

  • The burn is deep and affects the dermis.
  • The burn becomes infected.
  • The burn heals slowly due to poor care.

Superficial second-degree burns may not leave permanent scars, but there can be temporary skin discolouration. 

Deeper second-degree burns, on the other hand, are more likely to cause noticeable scars. 

The skin may also be more sensitive in the affected area even after it heals.

To minimise scarring, it’s important to:

  • Keep the burn clean and covered to prevent infection.
  • Avoid sun exposure, which can make scars more noticeable.
  • Apply moisturising creams or ointments to help with skin regeneration.

In some cases, scar treatments like silicone gel sheets or creams may be recommended by healthcare professionals to reduce the appearance of scars.

Conclusion

You should now have more of an understanding of what is a second degree burn. 

A second-degree burn is a painful injury that affects the skin’s epidermis and dermis. 

It is caused by factors like hot liquids, chemicals, fire, and sunburn. 

While not as severe as third-degree burns, second-degree burns require careful treatment and monitoring.

Cooling the burn, protecting the area, and seeking medical help if necessary can help promote healing. 

With proper care, second-degree burns often heal within 2-3 weeks, although deeper burns may take longer. 

Scarring is possible but can be minimised with appropriate treatment.

If you experience a second-degree burn, it is important to treat it as soon as possible and seek professional advice if the injury is extensive or becomes infected. 

With proper care, most second-degree burns will heal without long-term complications.

How to Treat a Burn

Burns can happen quickly and unexpectedly, and knowing how to treat them immediately is crucial.

But do you know how to treat a burn? 

Whether caused by fire, chemicals, electricity, or the sun, proper first aid can minimise damage and reduce the risk of infection. 

This article outlines the different types of burns and the best ways to treat them effectively.

Types of Burn

types of burn
Source: Wikipedia

There are four different classifications of burns:

First-Degree Burns

These are the least severe, affecting only the outer layer of skin (epidermis). 

Symptoms include redness, mild swelling, and pain. 

Sunburns are a common example of first-degree burns.

Second-Degree Burns

These burns penetrate both the outer layer and the underlying skin (dermis). 

They cause more intense pain, redness, swelling, and blisters. 

If left untreated, second-degree burns can result in scarring.

Third-Degree Burns

The most severe type of burn, third-degree burns affect all layers of the skin and may extend to deeper tissues. 

The skin can appear white, blackened, or charred, and the person may not feel pain due to nerve damage. 

These burns often require immediate medical attention and can lead to permanent damage.

Fourth-Degree Burns

Fourth-degree burns are the most severe form of burn, causing extensive damage to the skin, muscles, tendons, and bones.

These burns penetrate all layers of the skin and may also damage deeper tissues and bones.

The affected area may appear blackened or charred, and due to severe nerve damage, there may be little or no pain.

Fourth-degree burns are critical and require urgent medical attention.

Burn Type

Burns can also be categorised by their cause. 

These include thermal burns (from heat), electrical burns (from electrical sources), chemical burns (from toxic substances), and sunburns (caused by overexposure to UV light). 

Each type of burn requires specific care to minimise damage and promote healing.

How to Treat a Burn

how to treat a burn image

Providing immediate first aid is crucial to minimise burn damage and alleviate pain. 

Here are the essential steps to follow:

Stop the Burning Process

Quickly remove the person from the source of the burn, whether it’s fire, hot liquid, or electricity. 

Remove any clothing or jewellery near the affected area, but be cautious not to pull off anything stuck to the skin, as this could cause further damage.

Cool the Burn

For most burns, hold the affected area under cool (not icy) running water for 20 minutes. 

This helps reduce both pain and the extent of the burn. 

Avoid using ice, as it can cause further tissue damage. 

Greasy substances like butter or oils should also be avoided, as they trap heat and worsen the injury.

Keep Warm

If the burn is severe and covers a large area, wrap the person in a blanket or add layers of clothing to maintain warmth. 

This helps prevent hypothermia, particularly if the burn is extensive.

Cover the Burn

After cooling the burn, cover it with clean cling film or plastic wrap. 

If the burn is on a hand or arm, use a non-stick cloth. 

Avoid wrapping it tightly, as it may cause more harm.

Treat the Pain

For pain relief, offer over-the-counter medications like paracetamol or ibuprofen. 

Do not give aspirin to children under 16 years old.

Raise the Area

If possible, elevate the affected area to reduce swelling, particularly for burns on limbs.

How to Treat an Electrical Burn

how to treat an electrical burn

Electrical burns can be dangerous, even if they seem minor. 

Here’s how to treat them:

Disconnect the Power

For safety reasons, the first step is to ensure the power supply is turned off. 

If you cannot immediately turn off the power, use a material that does not conduct electricity, such as a wooden stick or a dry cloth, to move the person away from the electrical source. 

Never touch the person directly while they are still in contact with the electrical current.

Seek Medical Attention

Even if the burn appears small, it’s crucial to seek medical help immediately. 

Electrical burns can cause deep internal damage, including to organs or tissues, which may not be visible. 

Only a healthcare professional can properly assess the extent of the injury.

Do Not Approach High-Voltage Sources

For burns caused by high-voltage electricity (1,000 volts or more), never approach the person until the power is safely turned off. 

Call emergency services immediately, as these burns can cause severe damage and require immediate medical care.

How to Treat a Chemical Burn

how to treat a chemical burn

Chemical burns can cause significant damage if not treated promptly. 

Here’s what you should do if you encounter one:

Identify the Chemical

If possible, try to determine what chemical caused the burn. 

Knowing the substance involved helps medical professionals provide the correct treatment. 

Check for labels on containers or ask the person who was burned, if they can identify the chemical.

Wear Protective Gear

If you’re assisting someone with a chemical burn, wear gloves or any other appropriate protective gear. 

This helps prevent further exposure to the chemical and contamination for both you and the injured person.

Remove Contaminated Clothing

Carefully take off any clothing that has come into contact with the chemical. 

Be sure to avoid spreading the chemical to other areas of the body. 

If clothing is stuck to the skin, do not attempt to pull it off.

Flush with Water

Use running water to rinse the affected area for at least 20 minutes. 

This will dilute and wash away any chemical residue. 

If the chemical is dry or powdery, gently brush it off before flushing the area.

Seek Medical Help

Even if the burn appears minor, always seek medical assistance immediately. 

Chemical burns can cause internal damage, and only trained professionals can provide proper treatment.

How to Treat Sunburn

how to treat sunburn

Sunburns, though common, can be uncomfortable and painful. 

Here’s how to treat sunburn and ease the discomfort:

Move to Shade

The first step is to get out of the sun. 

Move the affected person into the shade or preferably indoors to prevent further exposure to UV rays.

Cool the Skin

To relieve the heat in the skin, take a cool shower or bath for about 10 minutes. 

Avoid using hot water, as this can further irritate the burn.

Apply After-Sun Lotion

Use after-sun lotion or aloe vera gel to soothe the skin and provide moisture. 

These products can help cool and hydrate the burn. 

Avoid using greasy or oily products like petroleum jelly, as they can trap heat in the skin and worsen the burn.

Pain Relief

To reduce pain, over-the-counter medications like paracetamol or ibuprofen can be used. 

Always follow the manufacturer’s instructions. 

Never give aspirin to children under 16 years of age due to the risk of Reye’s syndrome.

Stay Hydrated

Sunburns can lead to dehydration, especially if the skin is extensively burned. 

Drink plenty of fluids, particularly water, to stay hydrated.

Monitor for Heat Exhaustion

Watch for signs of heat exhaustion or heatstroke, which include dizziness, rapid pulse, or vomiting. 

If symptoms worsen, seek immediate medical help.

When Should You Go to Hospital With a Burn?

when to go hospital with burn

While many burns can be treated at home, there are some situations where immediate medical attention from a healthcare professional is required. 

You should seek medical attention if:

Large Burns

If the burn covers an area larger than the size of the person’s hand, it requires medical evaluation. 

Larger burns can be more severe and prone to complications.

Deep Burns

Burns that cause the skin to appear white, blackened, or charred indicate severe tissue damage. 

These require prompt medical attention.

Burns on Sensitive Areas

Burns to the face, neck, hands, feet, joints, or genitals are considered high-risk and should be treated at a hospital. 

These areas have delicate tissue and can lead to long-term complications if not properly treated.

Electrical or Chemical Burns

Any burn caused by electricity or chemicals must be evaluated by healthcare professionals. 

These burns can cause deeper, hidden damage and may lead to serious complications.

Signs of Shock

Symptoms of shock include cold, clammy skin, rapid breathing, weakness, and dizziness. 

If any of these occur, immediate medical attention is necessary.

Special Conditions

Children under 10, people with medical conditions such as heart disease or diabetes, or those with a weakened immune system should seek hospital care for burns.

Breathing Problems

If someone has inhaled smoke or fumes, they should be assessed at a hospital, even if they seem fine.

Things to Avoid When Treating a Burn

When treating a burn, it’s essential to avoid certain actions that can cause further damage. 

Here’s a list of things to steer clear of:

Ice or Ice Water

Applying ice or using ice-cold water to cool a burn can cause frostbite and further harm the skin. 

It also slows down blood flow, which can worsen the injury.

Butter or Greasy Substances

Never apply butter, oils, or greasy creams to a burn. 

These substances may feel soothing initially, but they can trap heat and hinder the cooling process, making the burn worse.

Breaking Blisters

If blisters form on the burn, avoid popping them. 

Blisters act as a natural barrier to protect the skin underneath from infection. 

Popping them exposes the sensitive tissue and increases the risk of infection.

Tight Bandages

Don’t wrap a burn with tight bandages. 

This can restrict blood flow and increase the severity of the injury. 

If a bandage is necessary, use a loose, non-stick dressing to cover the burn.

Scrubbing the Area

Avoid scrubbing or rubbing the burned skin, as this can cause irritation and damage to the affected area. 

Gently clean the burn using cool water and avoid friction that could lead to further injury.

Burn Aftercare

burn aftercare

Once the immediate first aid has been applied, proper aftercare is vital for the burn to heal properly. 

Here are some steps to follow:

Keep the Area Clean

Gently wash the burn with mild soap and water to prevent infection. 

Avoid scrubbing the burn, as this can cause further damage. 

Do not use harsh chemicals or strong soaps, as they can irritate the skin and delay healing.

Moisturise

To prevent the skin from drying out and to promote healing, apply a soothing lotion, such as aloe vera gel. 

Aloe vera helps hydrate the skin and reduce inflammation. 

Avoid using products with alcohol, as they can dry out the skin and cause irritation.

Monitor for Infection 

It’s important to keep an eye on the burn for signs of infection. 

Symptoms such as increased redness, swelling, pus, or an unpleasant smell may indicate an infection. 

If you notice any of these signs, seek medical help immediately to prevent complications.

Avoid Further Sun Exposure

The burn should be kept out of direct sunlight to prevent further skin damage and reduce the risk of scarring. 

Consider covering the area with loose clothing or using sunscreen once the skin has healed enough.

Follow-Up Care

For severe burns, follow-up care may be necessary. 

This may include dressing changes, further treatment, or checking for complications, and should be done under the guidance of a healthcare professional.

Conclusion

You should now have the knowledge on how to treat a burn.

Treating a burn correctly and promptly can significantly reduce pain and the risk of complications. 

It is essential to follow proper first aid steps, such as cooling the burn, protecting the area, and seeking medical help when necessary.

10 Most Common Flammable Materials

Flammable materials are everywhere in our daily lives, both at home and work. 

Understanding what they are and how to handle them safely is essential for preventing accidents. 

They can be found in nearly every environment, from our homes to workplaces, factories, and vehicles. 

Everyday products, such as cleaning agents, fuels, and textiles, can all be flammable.

In this article, we will explore what flammable materials are, why they are dangerous, and how to stay safe around them. 

We will also look at 10 of the most common flammable materials that you might encounter regularly. 

By learning to identify these materials and how to handle them correctly, you can help prevent fires and keep your surroundings secure. 

What Are Flammable Materials?

Flammable materials are substances that can easily ignite and catch fire when exposed to heat, flame, or sparks. 

These materials have a low flashpoint, which is the temperature at which they release enough vapor to catch fire.

Materials with a flashpoint under 100°F (37.8°C) are generally considered flammable.

Flammable materials can be found in solids, liquids, or gases and can be natural or man-made.

It’s important to handle flammable materials with care, store them properly, and use them in safe conditions. 

Recognising and understanding flammable substances in your environment is crucial for preventing fires and ensuring safety in both homes and workplaces. 

Proper knowledge and caution can minimise the risk of accidents.

10 Most Common Flammable Materials

Flammable materials are substances that can catch fire easily when exposed to heat, sparks, or open flames. 

Many of these materials are found in our homes, workplaces, and public areas. 

Being aware of these materials and how to handle them safely is crucial in preventing accidents and ensuring fire safety. 

Here are 10 common flammable materials, explaining their characteristics and risks.

Acetone

flammable materials acetone
Source: Wikipedia

Acetone is a colorless, flammable liquid commonly used as a solvent in nail polish removers, paint thinners, and some cleaning products. 

Acetone is highly volatile and evaporates quickly, forming flammable vapours. 

Its flashpoint – the lowest temperature at which it can vaporize and ignite – is -4°F (-20°C), making it one of the most flammable substances in households.

Store acetone in a cool, dry, and well-ventilated area, away from heat and open flames and always use acetone in well-ventilated spaces, as the vapours can be hazardous to your health.

Alcohol Spirits

flammable materials alcohol spirits

Alcoholic spirits, such as vodka, whiskey, and rum, are commonly found in homes, bars, and restaurants. 

These beverages are made by fermenting and distilling various grains, fruits, and other ingredients. 

Due to their high alcohol content (usually above 20%), they are highly flammable and can ignite easily when exposed to heat, sparks, or open flames.

Make sure to store alcoholic spirits in tightly sealed containers, away from heat sources and open flames.

Deodorant

flammable materials deodorant
Source: Wikipedia

Aerosol deodorants contain flammable propellants such as butane or propane, which are highly volatile gases. 

These gases make deodorants easy to spray but also pose a significant fire hazard. 

If exposed to heat or flames, deodorant cans can explode, leading to serious injuries or property damage.

Store aerosol deodorants in cool, dry places and away from direct sunlight and always follow the manufacturer’s instructions on proper usage and storage.

Flour

flammable materials flour

Flour is a common ingredient in kitchens, but it can pose a significant fire risk. 

While flour itself doesn’t ignite easily, the fine flour particles can create a dust cloud that is highly combustible. 

If this dust comes into contact with a spark or flame, it can ignite and cause a dust explosion. 

This is particularly a concern in industrial environments like flour mills, but it is still important to be cautious in the home.

Clean up flour spills immediately, and avoid sweeping or vacuuming to prevent dust clouds.

Furniture Polish

flammable materials furnture polish

Furniture polish contains flammable chemicals, including solvents and oils that can easily ignite. 

These products are designed to clean and shine surfaces, but they often contain petroleum-based ingredients that make them highly flammable. 

Furniture polish is commonly used in homes and offices, so proper storage and handling are essential to avoid accidents.

Store furniture polish in a cool place, away from direct sunlight and heat sources.

Hair Spray

flammable materials hair spray
Source: Wikipedia

Hair sprays, like deodorants, are often contained in aerosol cans and contain flammable propellants such as butane, propane, or ethanol. 

These chemicals allow the product to spray evenly, but they also make the product highly flammable. 

When applied to the hair, hair spray can ignite if exposed to a flame or excessive heat, especially if used near a stove, cigarette, or open flame.

Always follow the manufacturer’s safety instructions on the label.

Hand Sanitiser

flammable materials hand sanitiser
Source: Wikipedia

Hand sanitisers, which contain high amounts of alcohol, are highly flammable and should be handled with care. 

Most hand sanitisers contain between 60% to 95% ethanol or isopropyl alcohol, both of which have low flashpoints. 

As these alcohol-based products have become increasingly popular, and not just found in the healthcare industry, it’s essential to be aware of the fire risks associated with improper use and storage.

Never use hand sanitiser near open flames or high-temperature surfaces.

Permanent Markers

flammable materials permanent markers
Source: Wikipedia

Permanent markers often contain flammable solvents such as toluene or xylene. 

These chemicals help the ink dry quickly and provide long-lasting marks. 

The solvents are highly volatile and can easily catch fire when exposed to heat or flames. 

Though the risk may seem small, using permanent markers around heat sources can be dangerous.

Avoid using permanent markers near candles, stoves, or any equipment that could generate sparks.

Petrol (Gasoline)

flammable materials petrol gasoline

Petrol, or gasoline, is one of the most well-known flammable substances. 

It is commonly used as fuel for vehicles, lawnmowers, and generators. 

Petrol has a low flashpoint, which means it can ignite easily when exposed to a heat source or spark. 

Petrol vapours are also highly flammable, making it dangerous to handle, especially when fueling up vehicles.

Always store petrol in approved containers and keep it away from living spaces and never refuel a vehicle or machine near an open flame, heat source, or while the engine is running.

Turpentine

flammable materials turpentine
Source: Wikipedia

Turpentine is a solvent derived from pine trees and is commonly used in paint thinners and cleaning products. 

It has a low flashpoint, making it highly flammable, and can ignite easily when exposed to heat, sparks, or open flames. 

Turpentine is used in various artistic and industrial applications but must be handled with care due to its volatile nature.

Make sure to store turpentine in airtight containers and away from heat sources or flames and use turpentine in well-ventilated areas to avoid inhaling harmful fumes.

How Can You Stay Safe Around Flammable Materials?

Ensuring safety around flammable materials is crucial to prevent accidents and ensure both personal and property safety. 

Here are some important steps to take:

Proper Storage

Always store flammable materials in well-ventilated areas away from heat sources, flames, or sparks. 

Use approved containers to hold liquids and keep them tightly sealed. 

Ensure that containers are labeled clearly to identify the material inside.

Keep Away from Flames

Avoid using flammable substances near open flames, heat sources, or electrical equipment. 

In areas where flammable materials are used, make sure there are no exposed wires or sparks that could ignite vapors.

Use Materials Carefully

When using flammable substances such as cleaning agents, paints, or aerosols, follow the manufacturer’s instructions carefully. 

Use them in well-ventilated spaces, and never leave them unattended while in use.

Proper Disposal

Dispose of flammable materials, such as rags soaked with oil or paint, in designated fire-resistant containers. 

Do not throw them in regular trash bins, as they could ignite from friction or heat.

Install Smoke Detectors

Ensure working fire detection, such as smoke detectors, are installed in areas where flammable materials are stored or used, such as kitchens or workshops. 

This can provide an early warning in case of a fire.

Keep Extinguishers Nearby

Keep fire suppression equipment such as fire extinguishers in places where flammable materials are stored or used. 

Be sure to have one suitable for the type of fire that could occur.

How is Flammable Different to Combustible?

Flammable and combustible are both terms used to describe materials that can catch fire, but they are not the same. 

The main difference lies in the temperature at which each type of material ignites.

Flammable materials are substances that ignite easily at relatively low temperatures, usually below 100°F (37.8°C). 

These materials are highly volatile, meaning they can catch fire quickly when exposed to heat, sparks, or flames. 

Flammable substances are particularly dangerous because they can release vapors that catch fire even without direct contact with a flame.

Combustible materials, on the other hand, require higher temperatures to catch fire, typically above 100°F (37.8°C). 

While combustible materials are still capable of burning, they are less likely to ignite quickly compared to flammable materials. 

Although they can burn, they are generally less hazardous than flammable materials in terms of ignition risks.

Conclusion

You should now have an understanding of 10 of the most common flammable materials.

Flammable materials are part of everyday life and require careful handling to ensure safety. 

Understanding their properties, risks, and differences from combustibles can help prevent accidents. 

By staying informed and following safety precautions, you can minimise the risks associated with these common materials. 

Always prioritise safety and treat flammable substances with caution.